How to get started with GitHub Actions

👋 Hey there! I'm Shivam, a self-taught web developer from India. My passion lies in web development, and I thrive on contributing to open-source projects and writing technical blogs. 🚀
Teamwork fuels my creativity, and I take pride in building efficient, user-friendly solutions. Let's code together! 💻🌟
You are probably familiar with Github. A platform to build software, collaborate with folks and contribute to open-source projects.
GitHub provides many functionalities that make your life easier as a developer.
In this blog, we are going to learn about GitHub Actions by using a simple example. This blog will help you to understand and get the basic idea of GitHub Actions. So, without wasting a bit. Let's start.
What are GitHub Actions?
In simple words, GitHub Actions help us to do things automatically when any event occurs.
Definition
GitHub Actions is a platform for automating software development, testing, and deployment. It allows us to run arbitrary code on our repository when a specific event happens.
So, with the help of GitHub Actions, you can write some code that will run whenever a particular event occurs. Events can be a PR, any issue, any push commit, and so on.
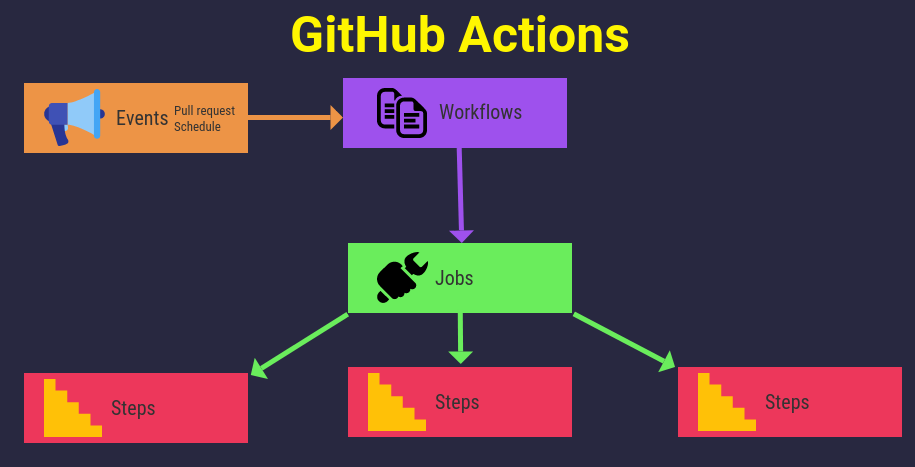
- GitHub Actions contains several components that help us to understand GitHub Actions more simply.
GitHub Actions Components
1️⃣ Event
An event is anything that can happen on a GitHub repository. It goes from pushing a code, creating a branch, opening a pull request, and even commenting on an issue. The list of triggers is much longer: you can check it out here.
2️⃣ Workflows
A workflow is a configurable automated process that runs one or more jobs.
Workflows are defined in YAML files and kept in the repository root directory in the .github/workflows directory. A repository can also have multiple workflows.
3️⃣ Jobs
A job is a collection of tasks executed in a workflow when triggered by an event. Each step is either a script or a Github action. A workflow can have multiple jobs that run in parallel.
4️⃣ Runners
Runners are processed on a server and run the workflow when triggered. Each runner is responsible for executing a given job. Runners are hosted in the cloud but can also be self-hosted in custom cloud environments.
5️⃣ Actions
Actions are individual tasks: they are called inside a job. Actions used to perform complex tasks that you may call multiple times and import into your workflows. You can build your actions or reuse some open-source actions from the GitHub marketplace and add them to your workflow directly when they meet your needs.
In this image, you can see the working of GitHub actions. You'll understand more once you see it with an example.
GitHub Actions Example
Now we will see a quick example of GitHub actions. This example will be short but will help you in grasping GitHub actions.
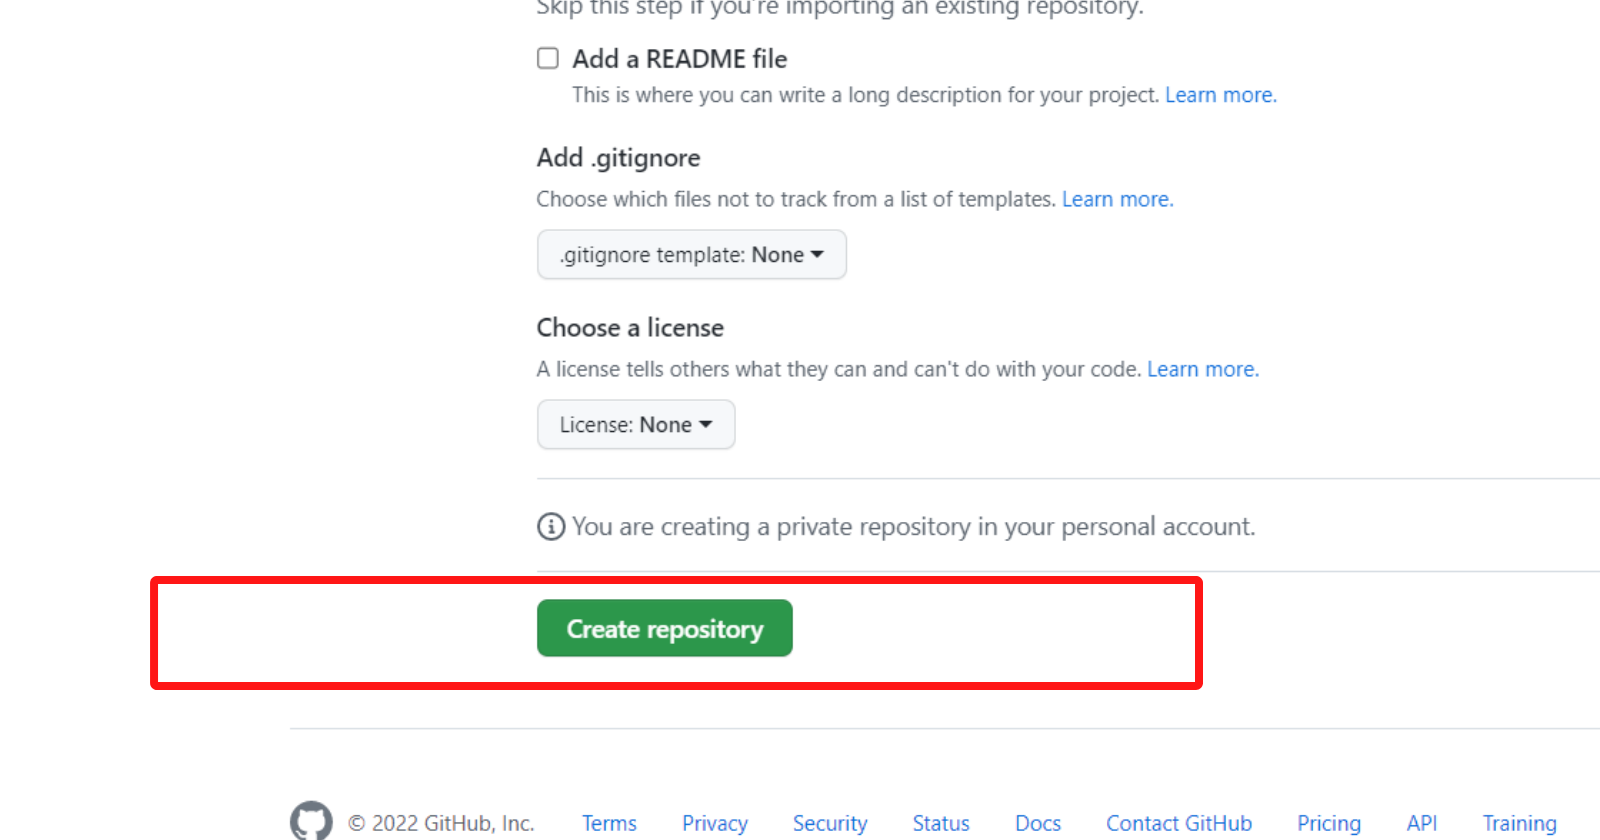
Go to your GitHub and create a new repository. Click on this new button to create a new repo.

Enter the name of your repository. I named github-actions-example.👇
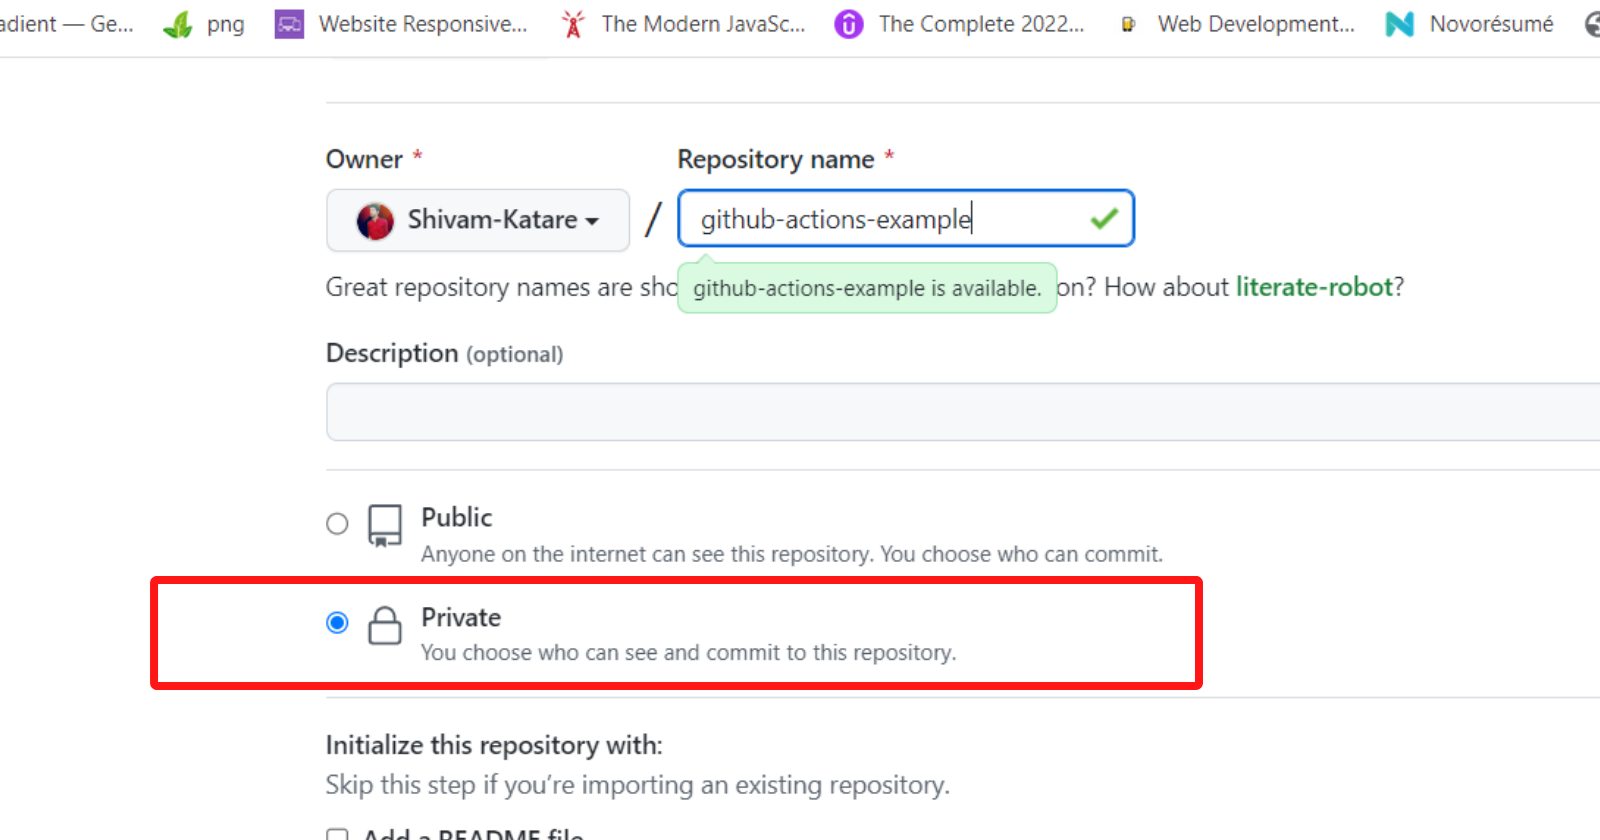
Now choose the visibility 👆 of your repo. I will pick private because it's just an example. You can pick as per your choice.
Click on the button👇. Your repo is created.
Note - I'm doing everything in the same place (in the browser) to help you understand it better. You can follow the same process with any code editor if you want.
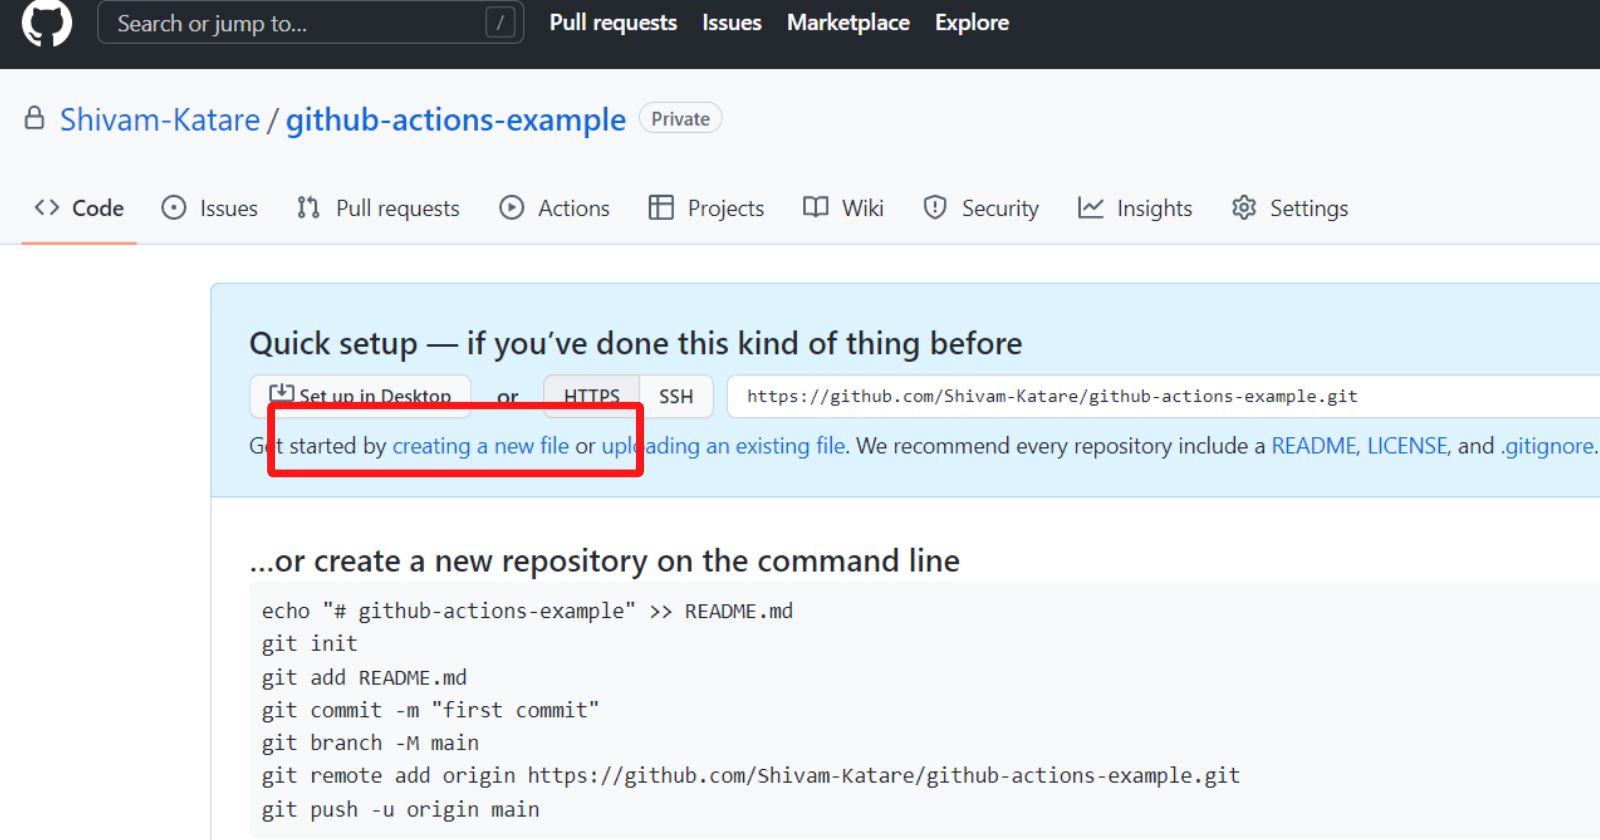
Click on create a new file. 👇
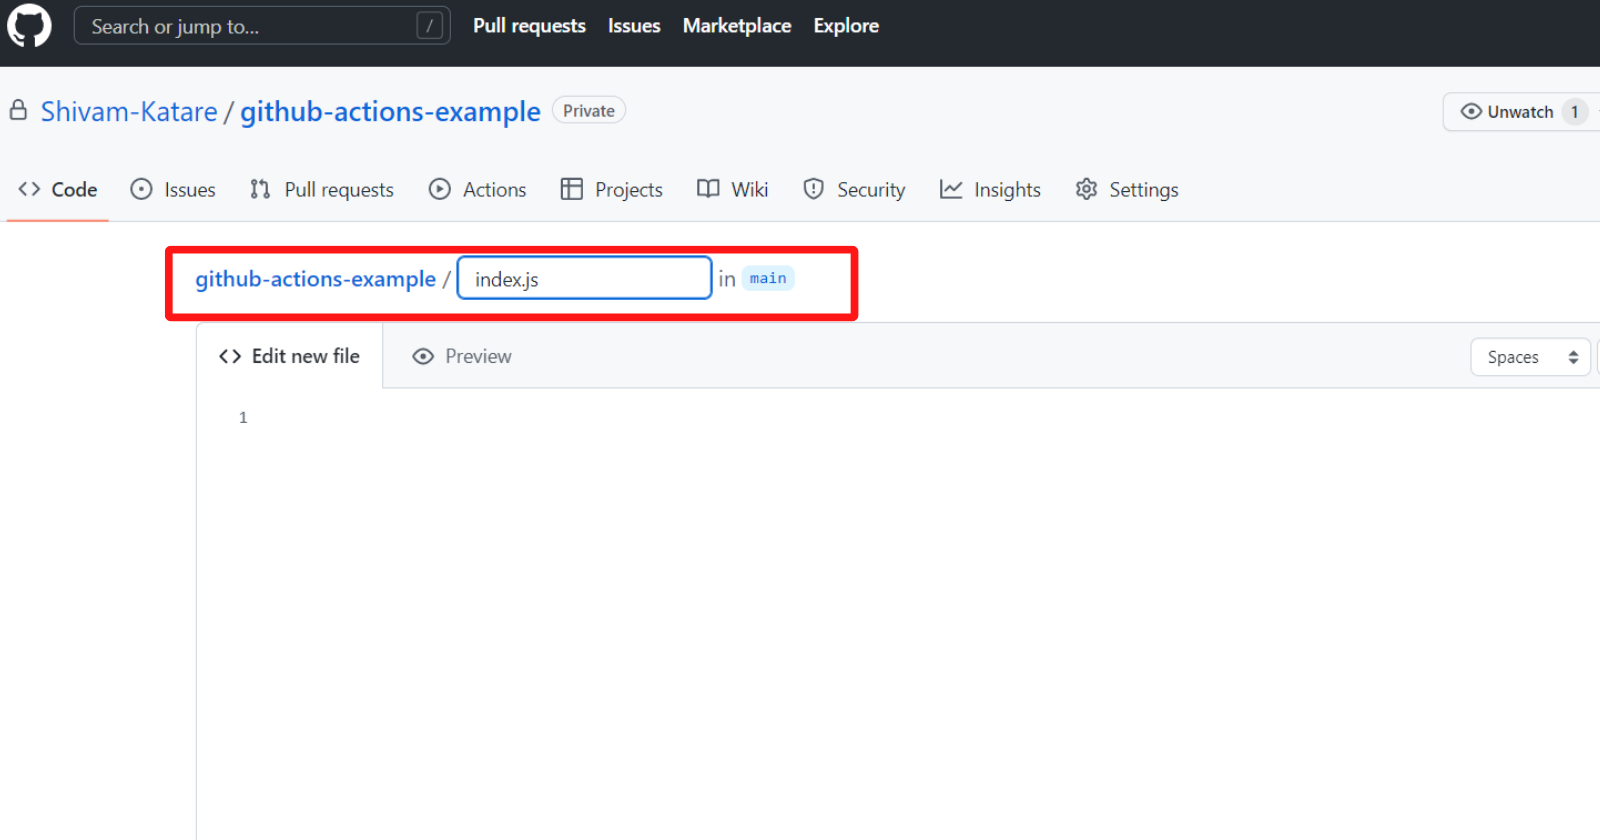
Enter your file name. I am using a JS file. You can make it as per your choice.
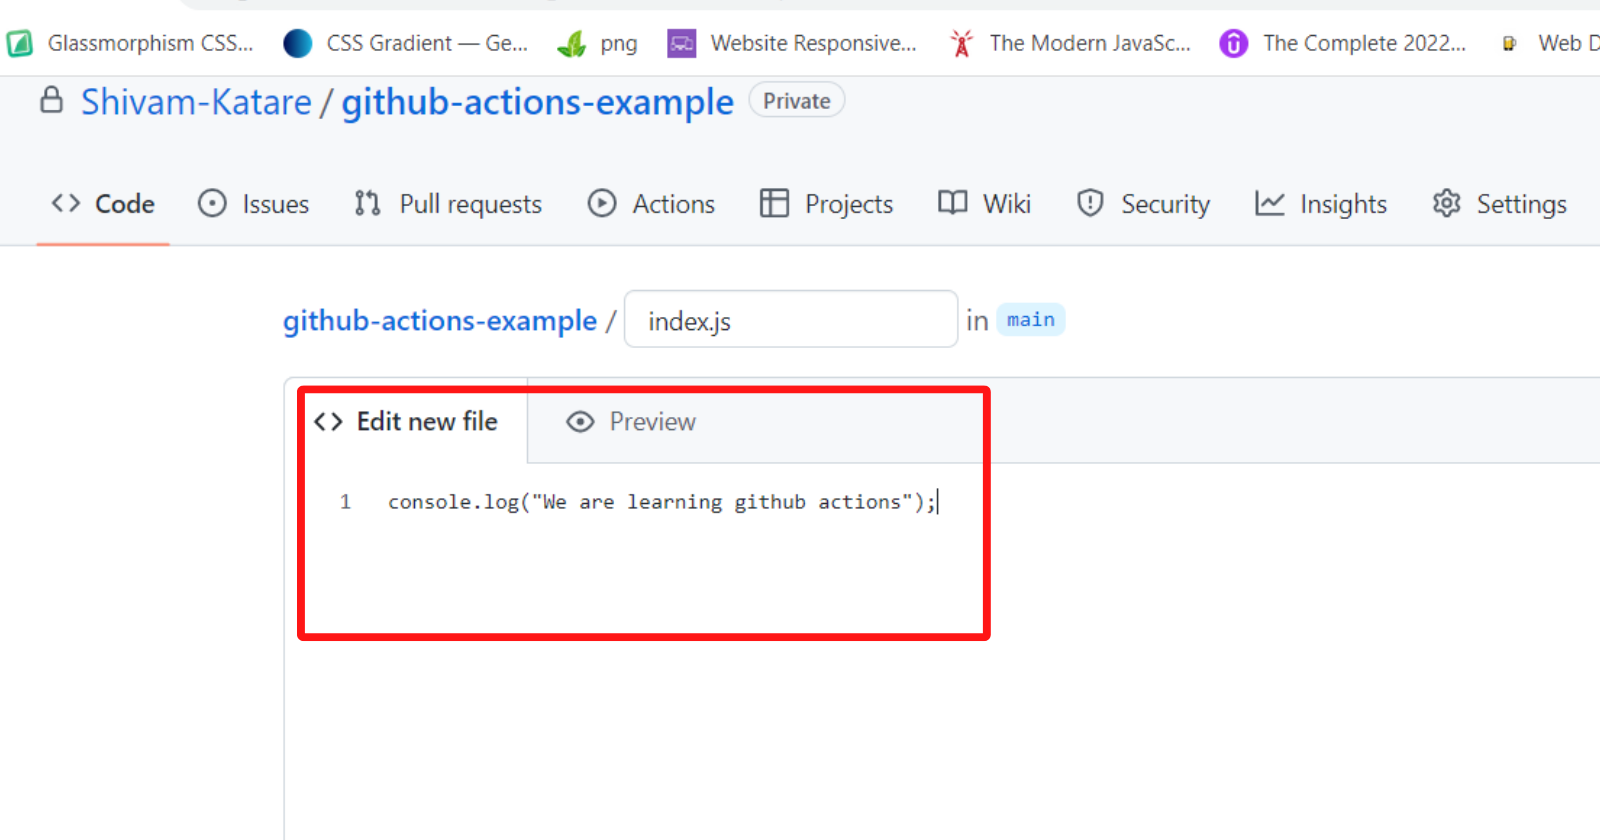
Start writing content in this file. I am writing this, 👇 you can write any program.
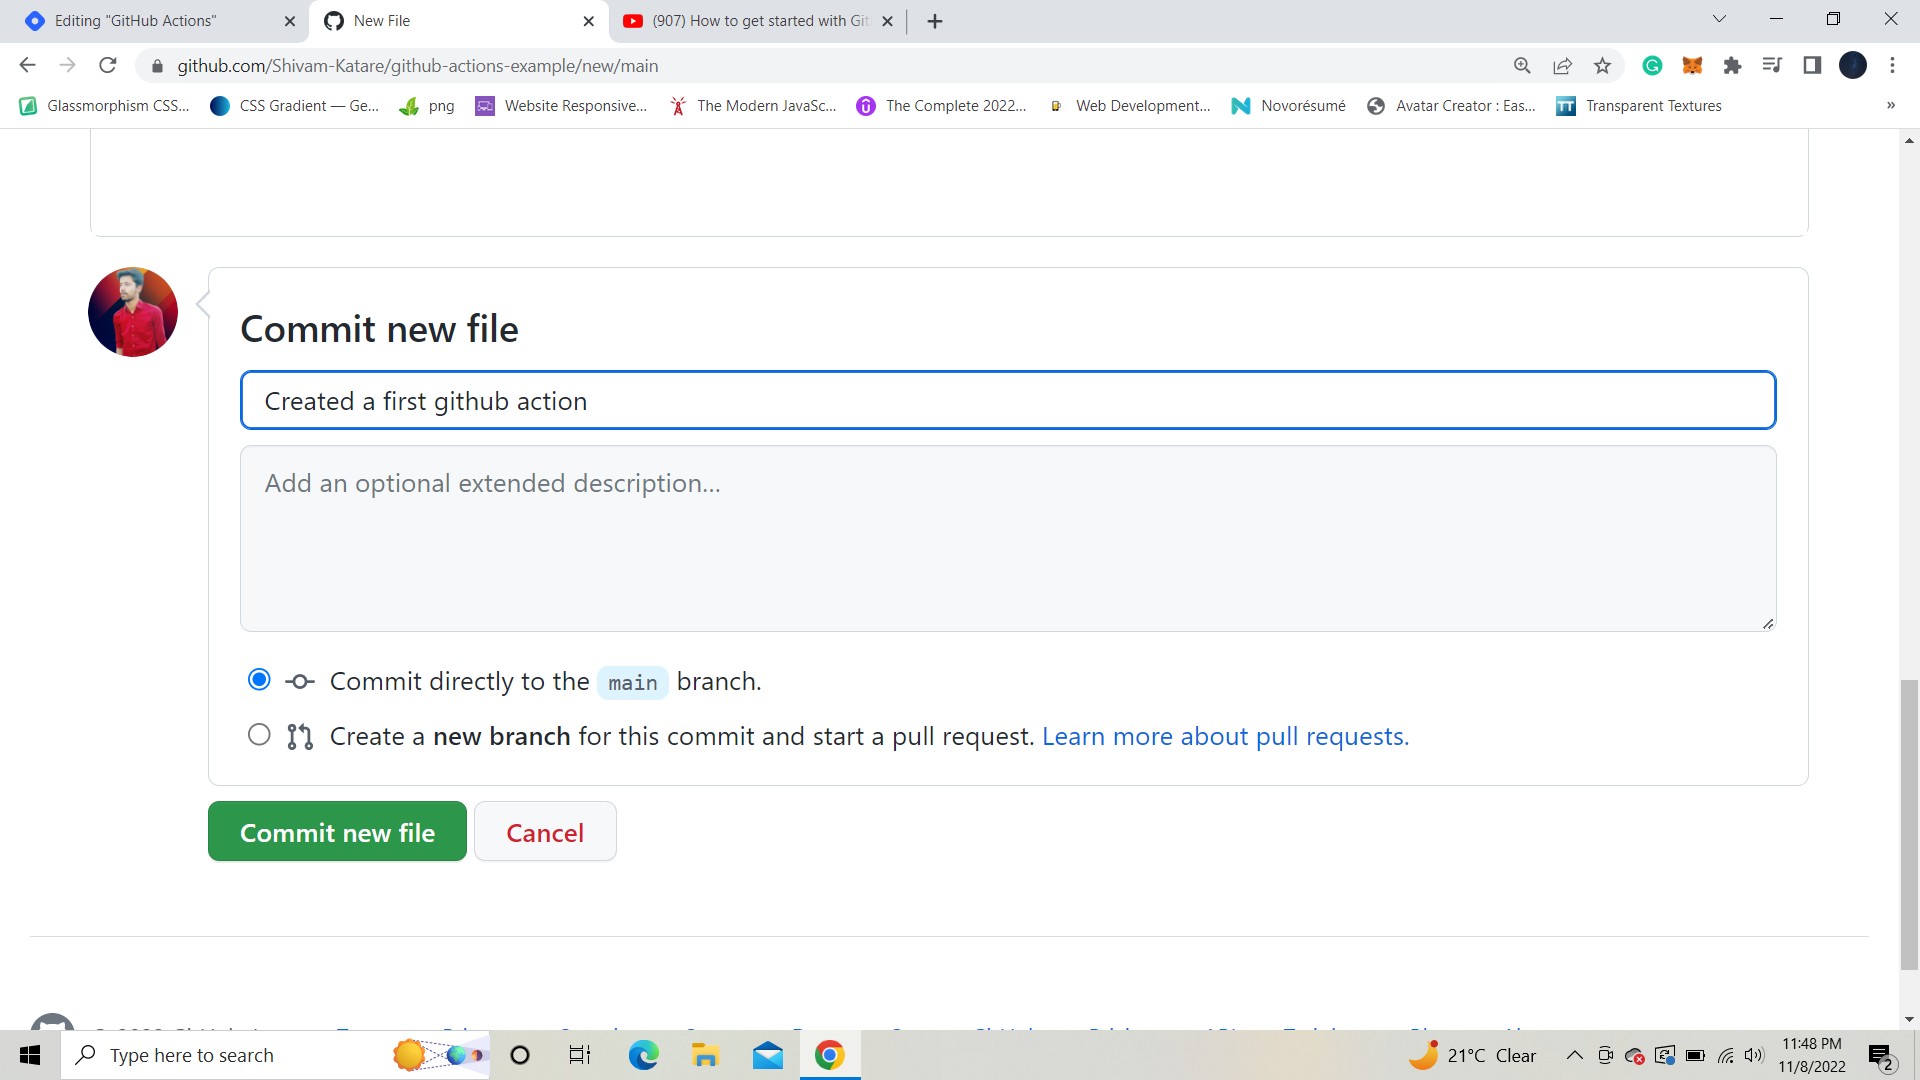
Now scroll down a bit and click on the the commit button. You can also write your commit message here.
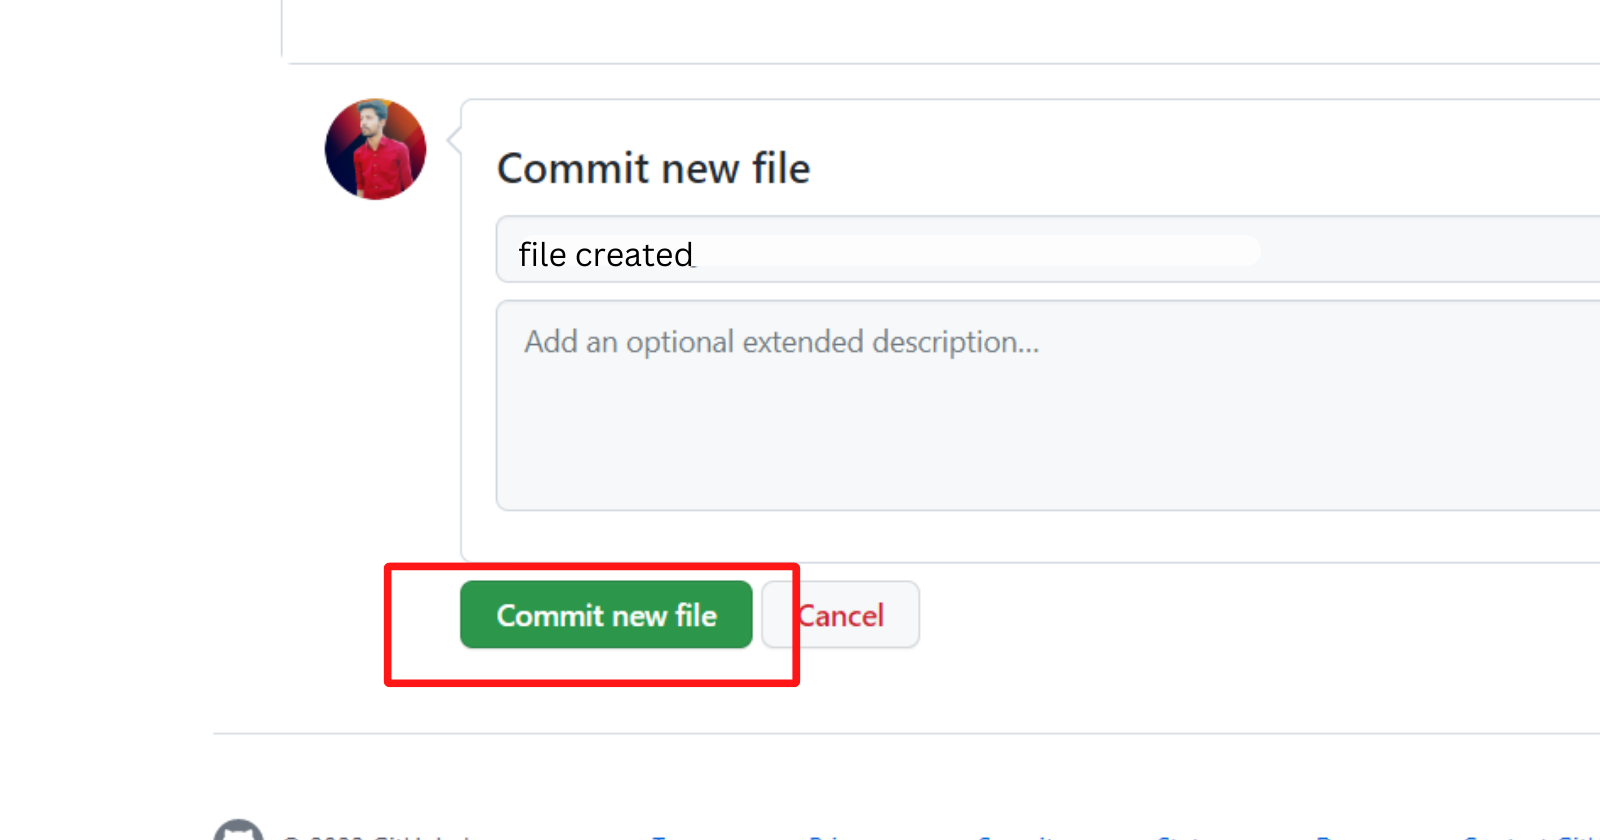
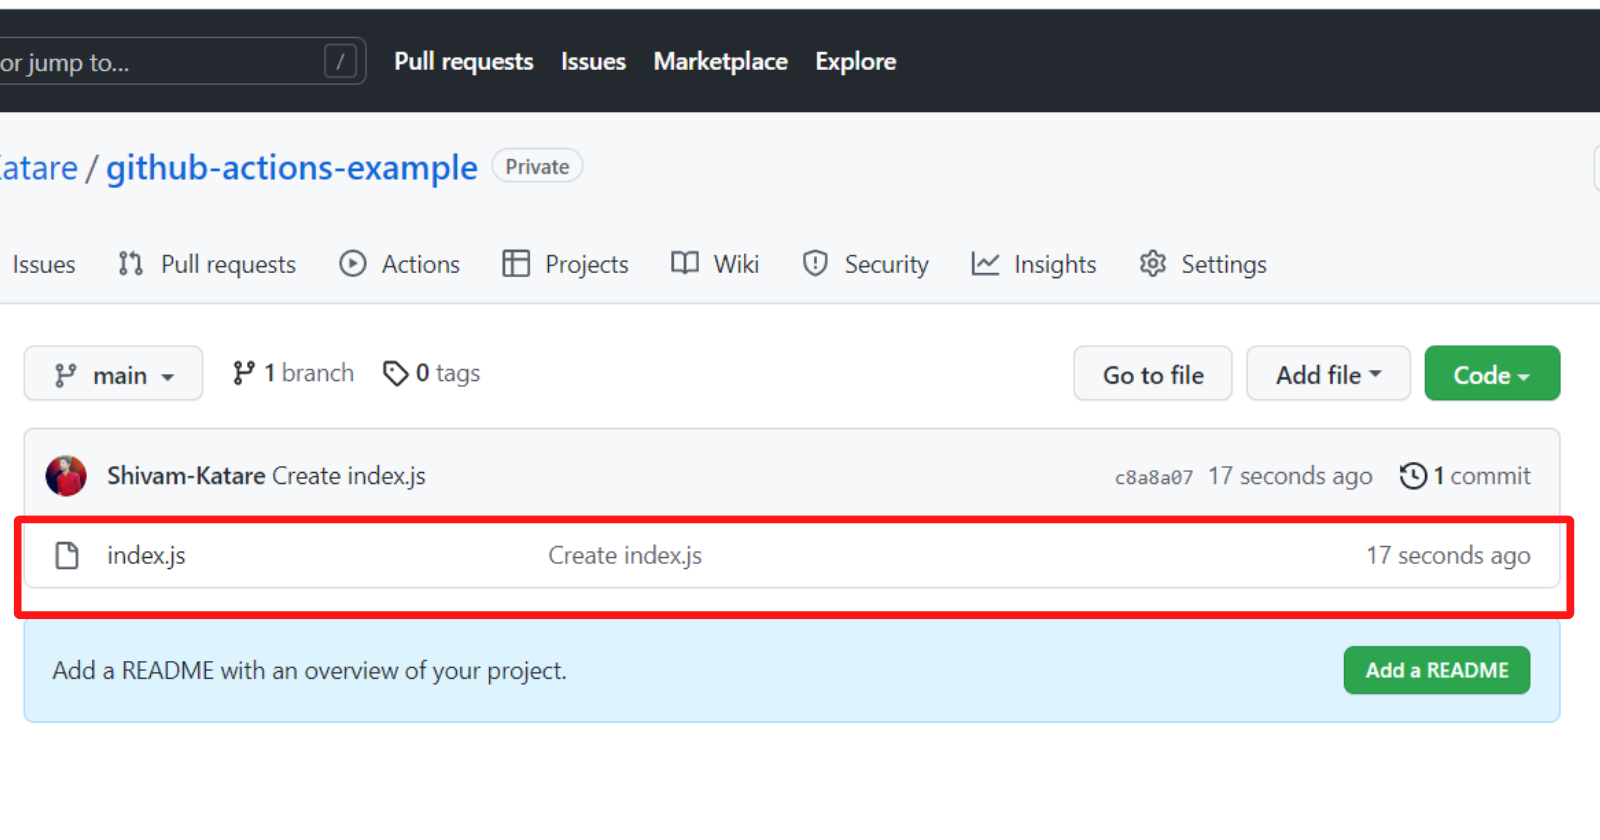
File created. 👇
Adding GH Actions
Now we will add the github actions to our repo.
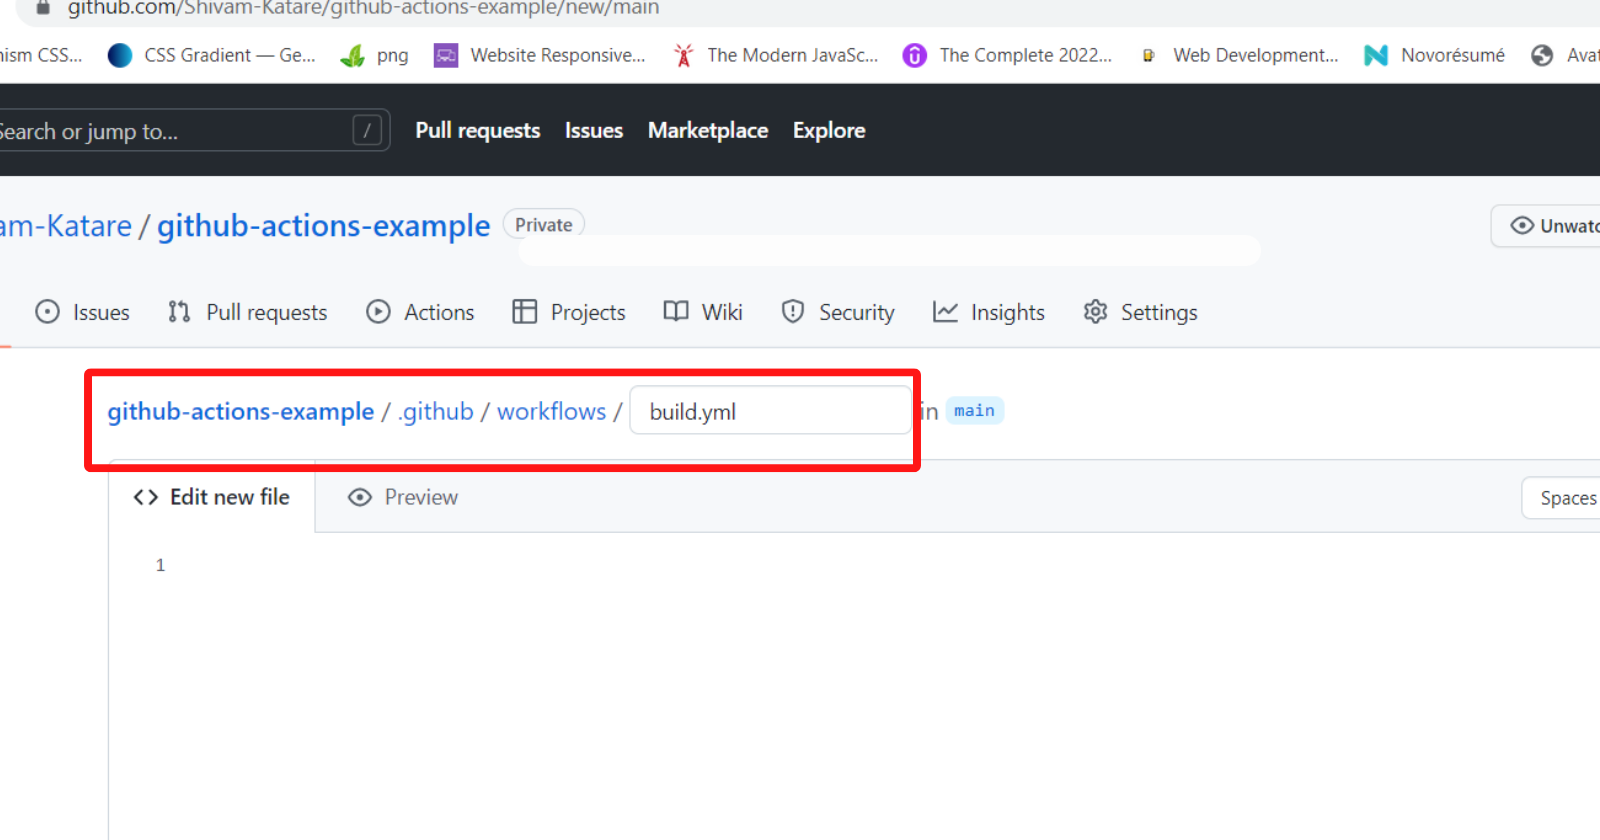
Note- Github Actions should be in a specific folder.
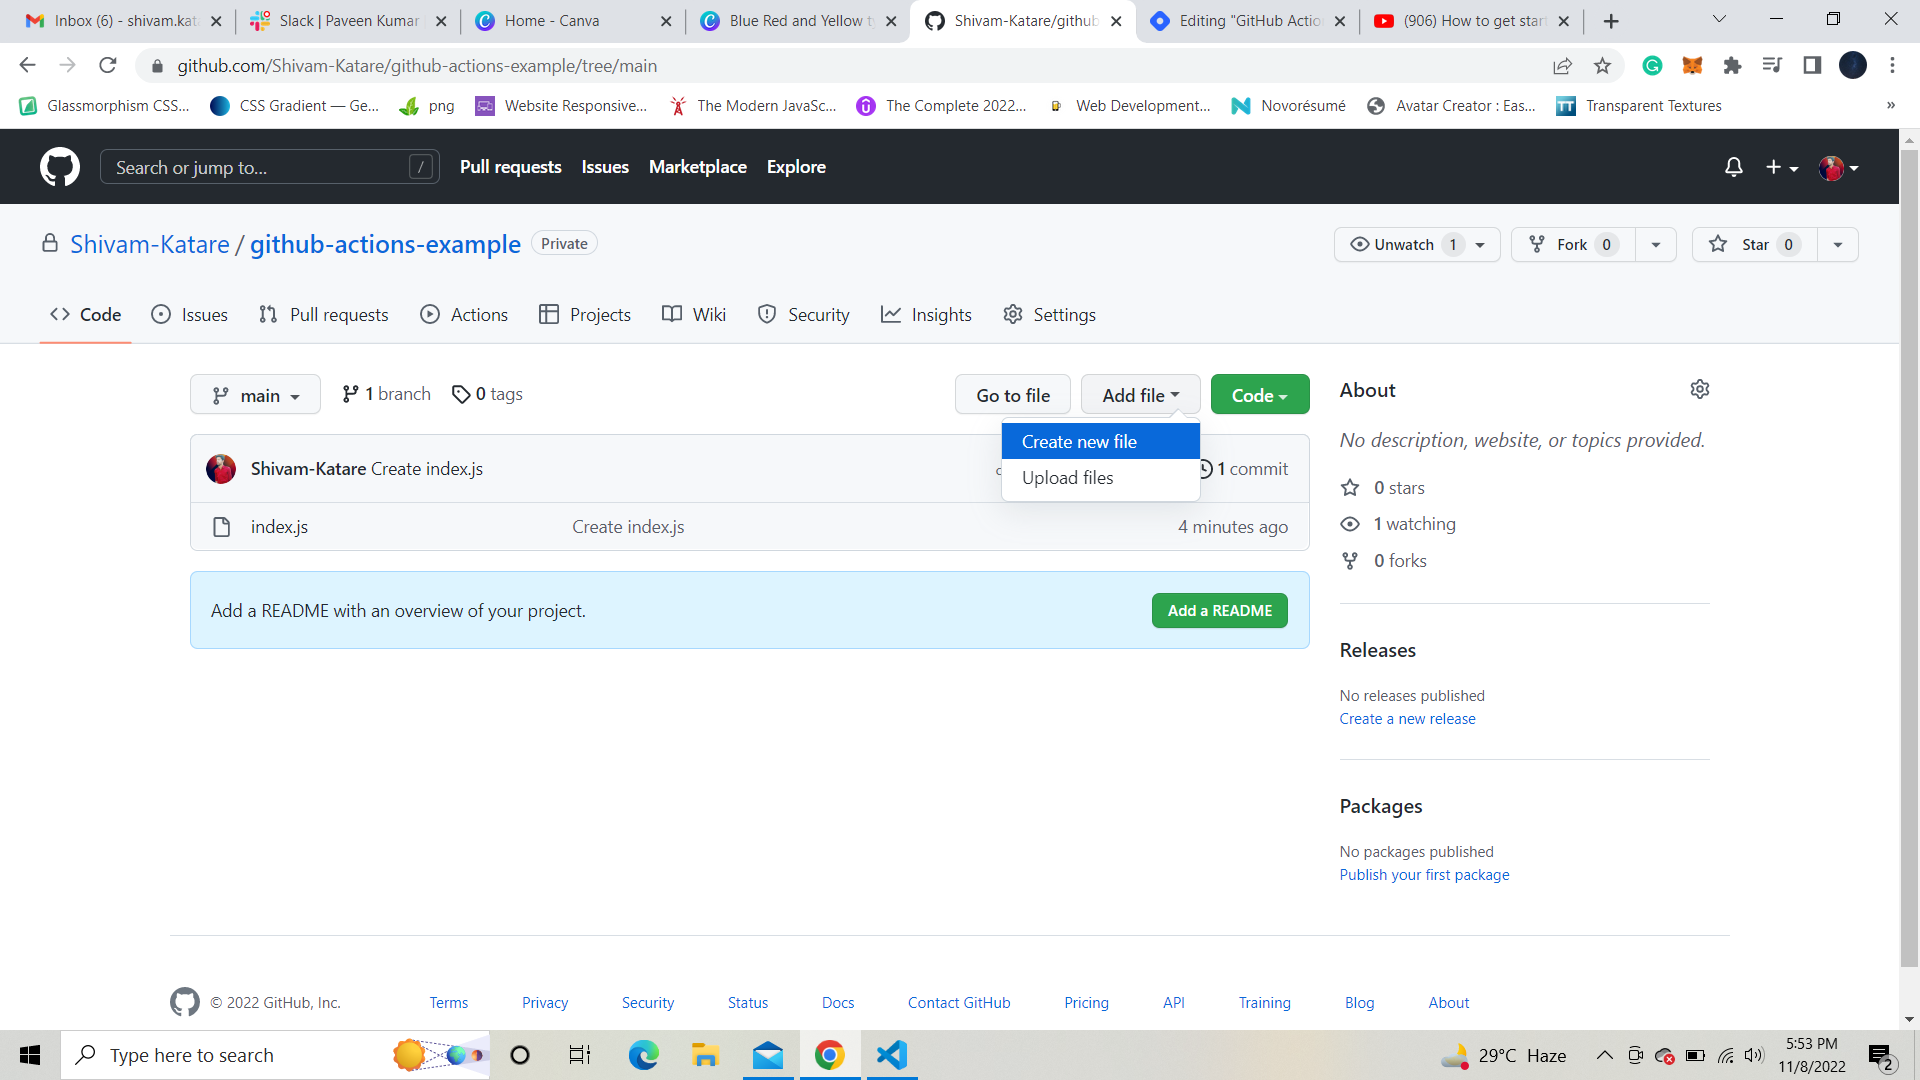
Click on the Add File button and create a new file.
Please enter the folder name(be sure to use the same name). I named .github (press the forward slash to enter into this folder) and create a new folder workflows. Into this folder, enter the name of your file(you can write any name here). This file should be a yaml. I named it build.yml 👇
In this file, we will be writing out github actions.
So, we will start with the name. This is the name of your github action.
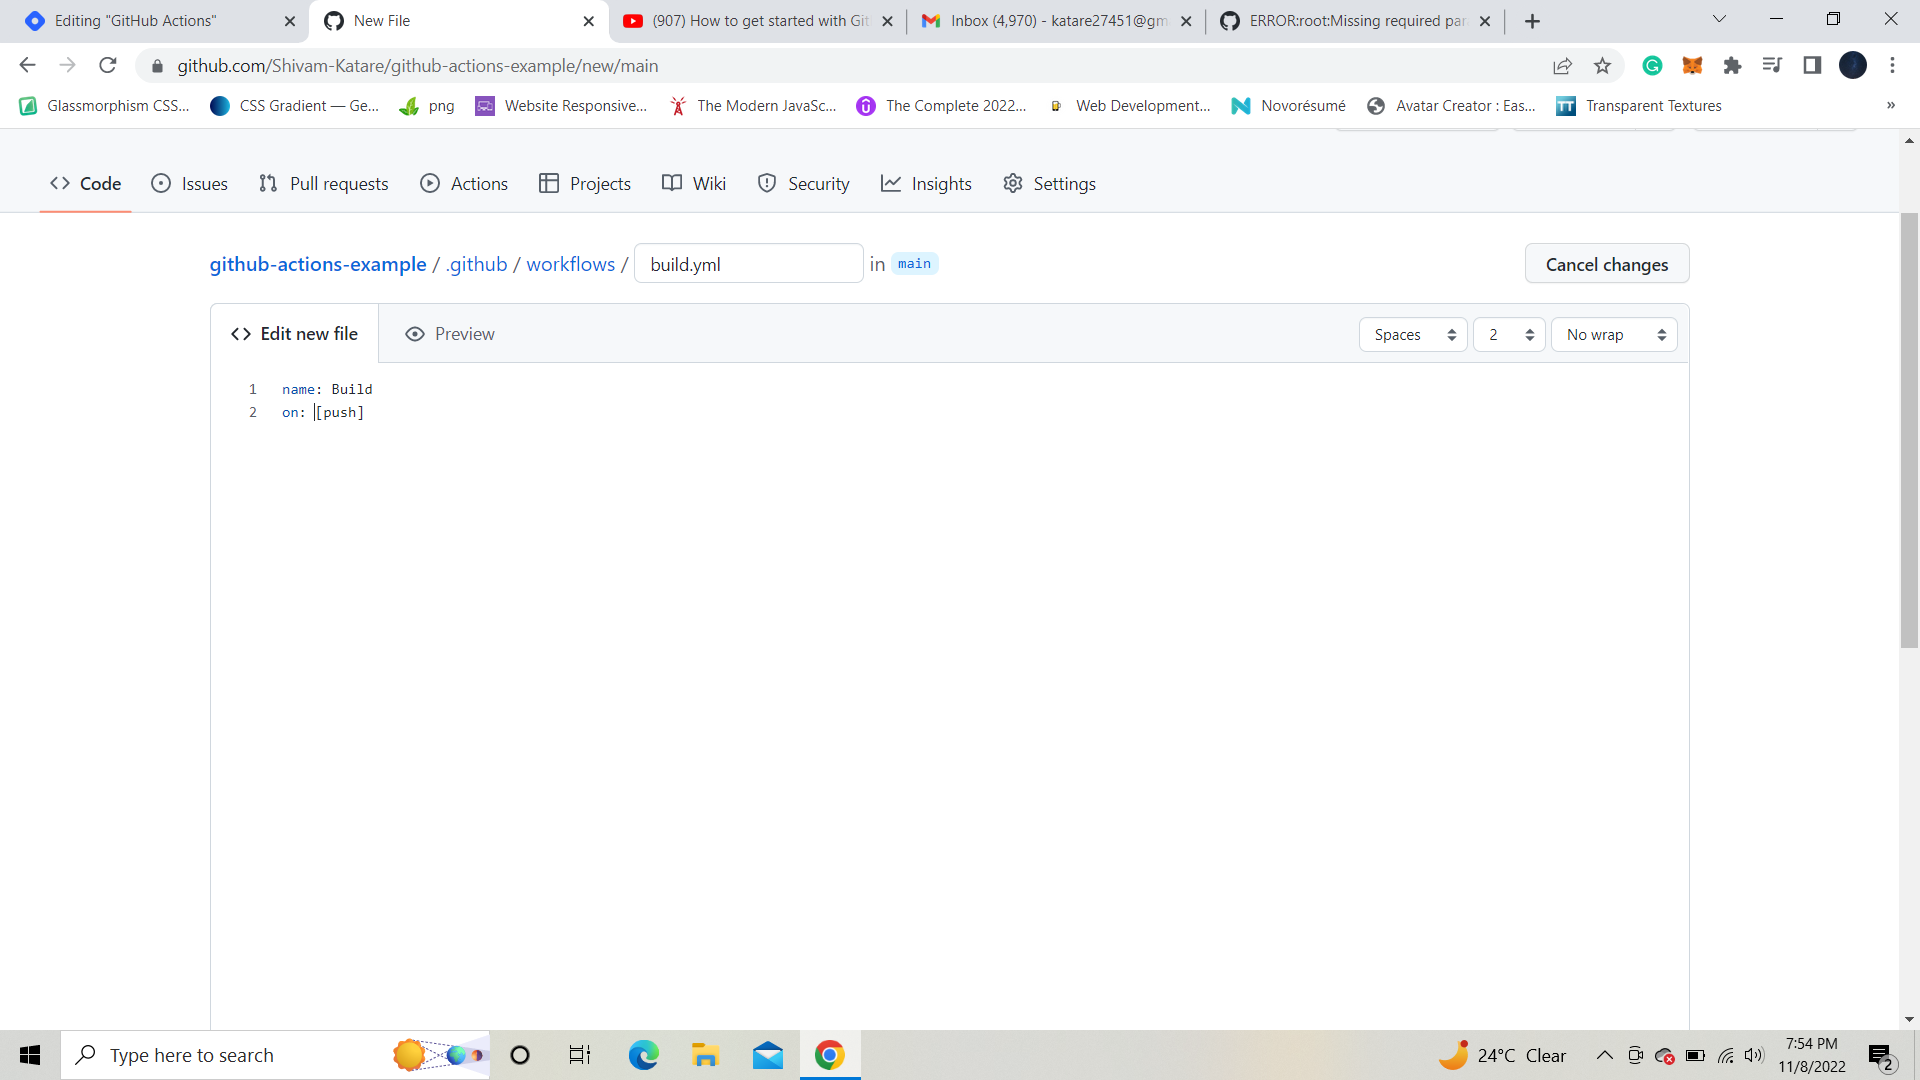
name: build
Now we will add trigger. The triggers can be a push, a pull, etc.
name: Build
on: [push]
Here we are using push. As a result, whenever someone pushes code to this repo, the github action is triggered.
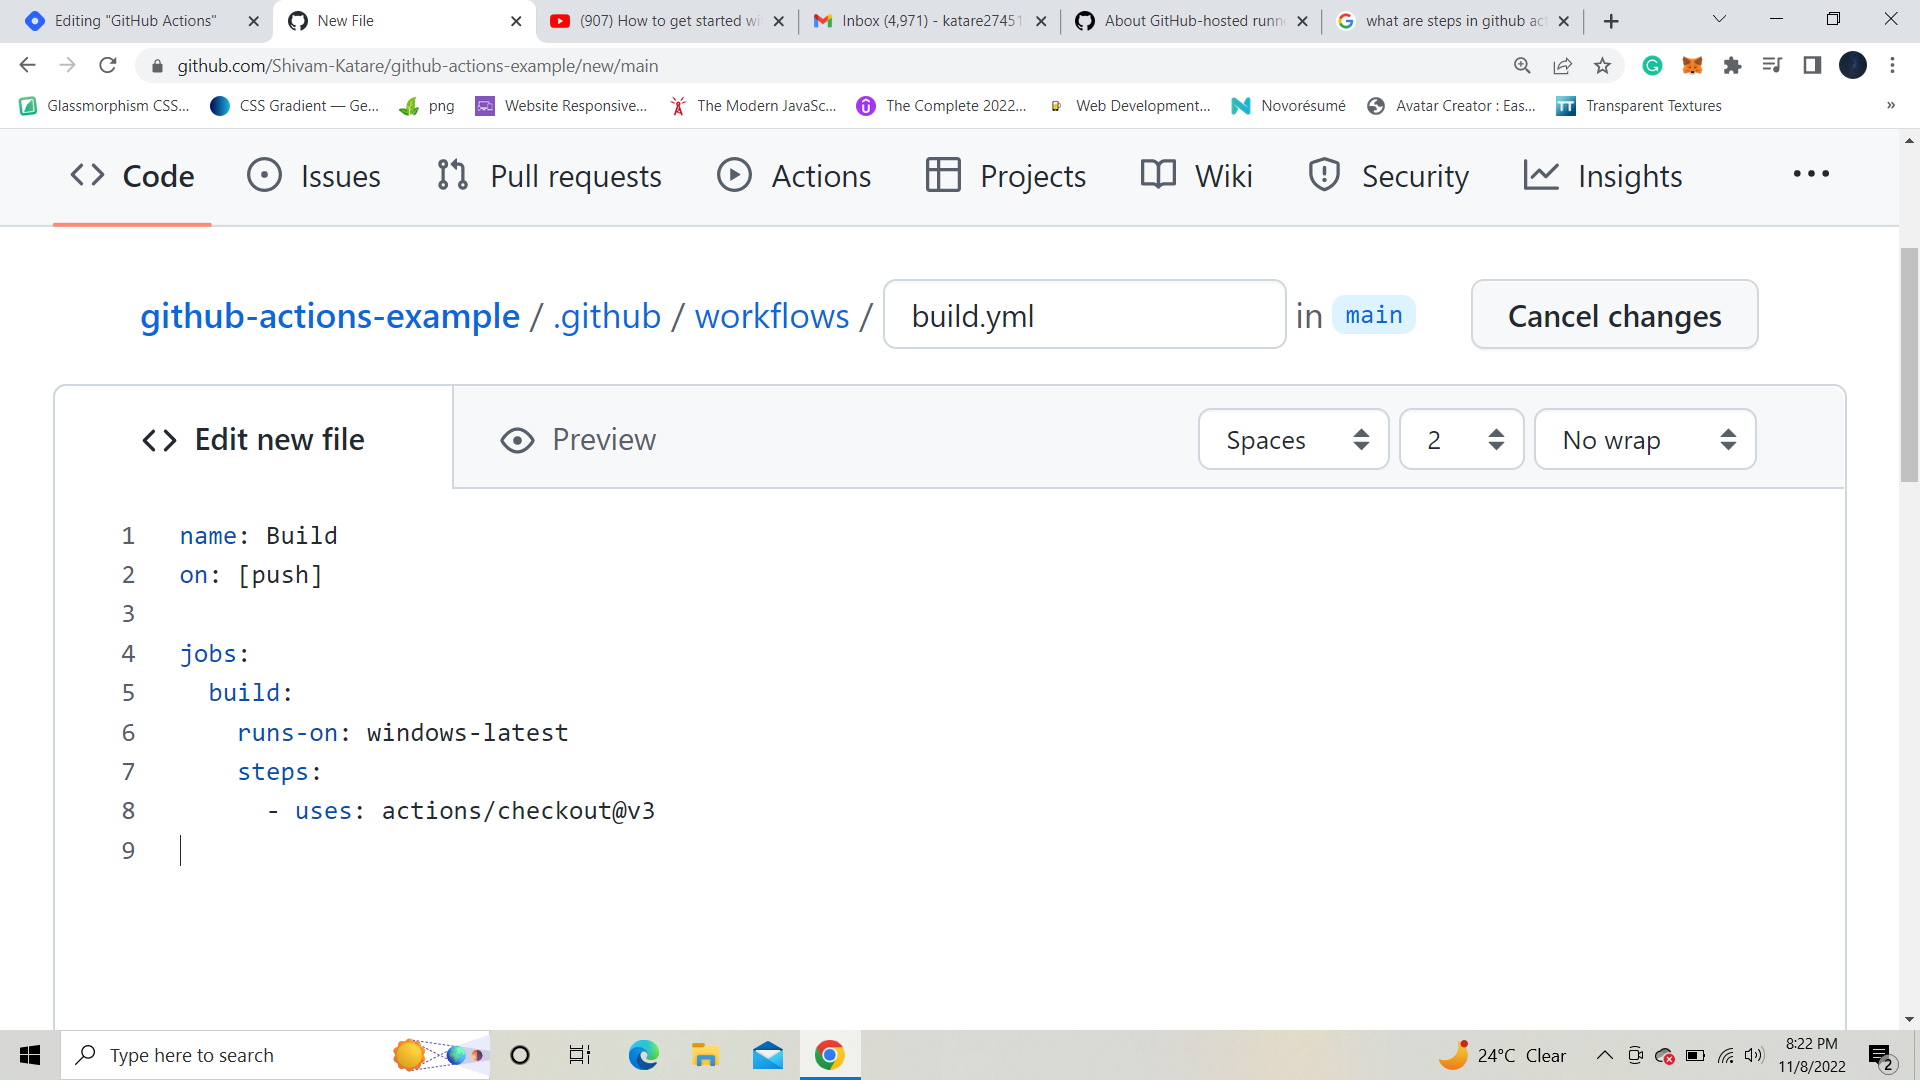
The next part is to define Jobs(we have learned about jobs above).
name: Build
on: [push]

jobs:
  build:    //this is the name of the job. You can give any name
    runs-on: windows-latest  // enter your machine name. If you're using Ubuntu, write ubuntu-latest. I am using windows.
In this job, we will have steps, and you can define multiple steps inside this job. Each step is either a script or a Github action.
- So, the first thing we want to do is check out the code so we can use it in a built-in GitHub action where we say, check out, and we're going to use version three(you can also use v2). 👇
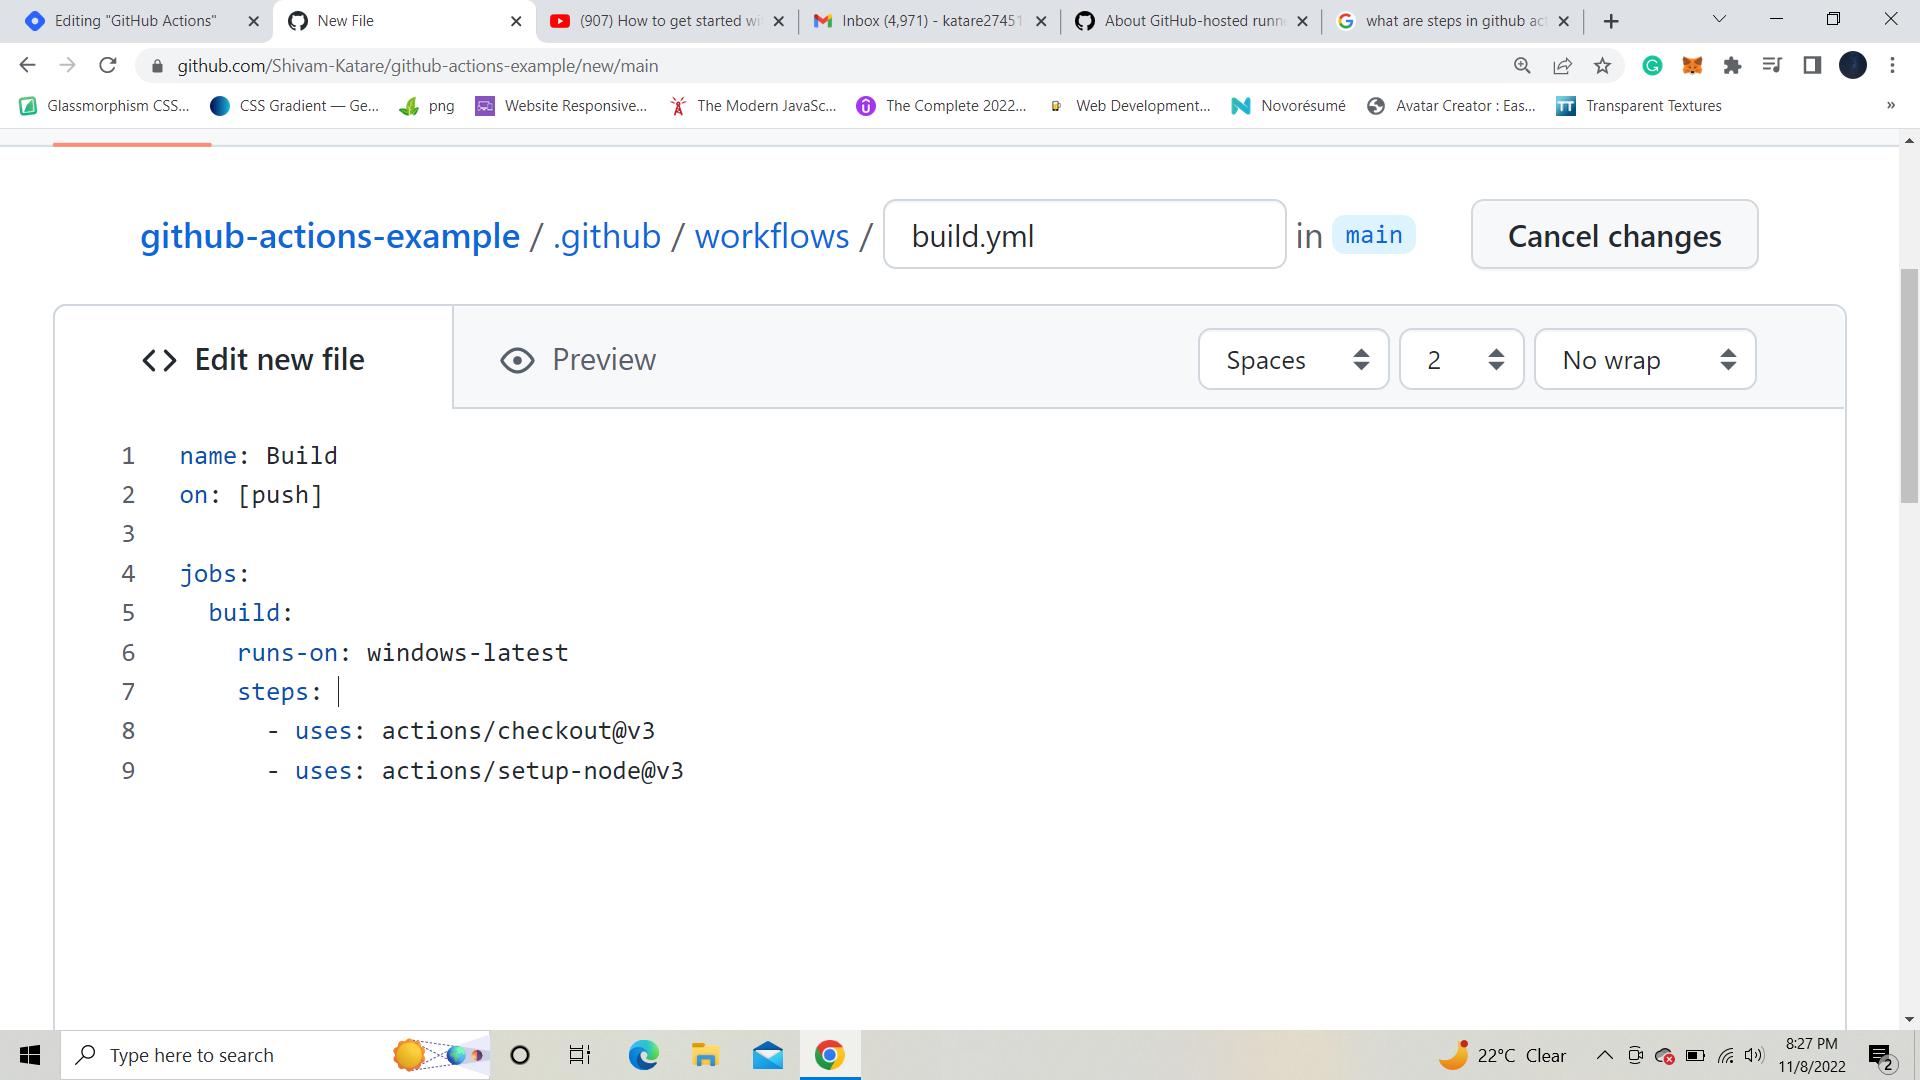
Next, we'll determine whether the code being pushed contains the node environment or not. So, for this, we will set up a node like this 👇
...

jobs:
  build:
    runs-on: windows-latest
    steps:
      - uses: actions/checkout@v3
      - uses: actions/setup-node@v3
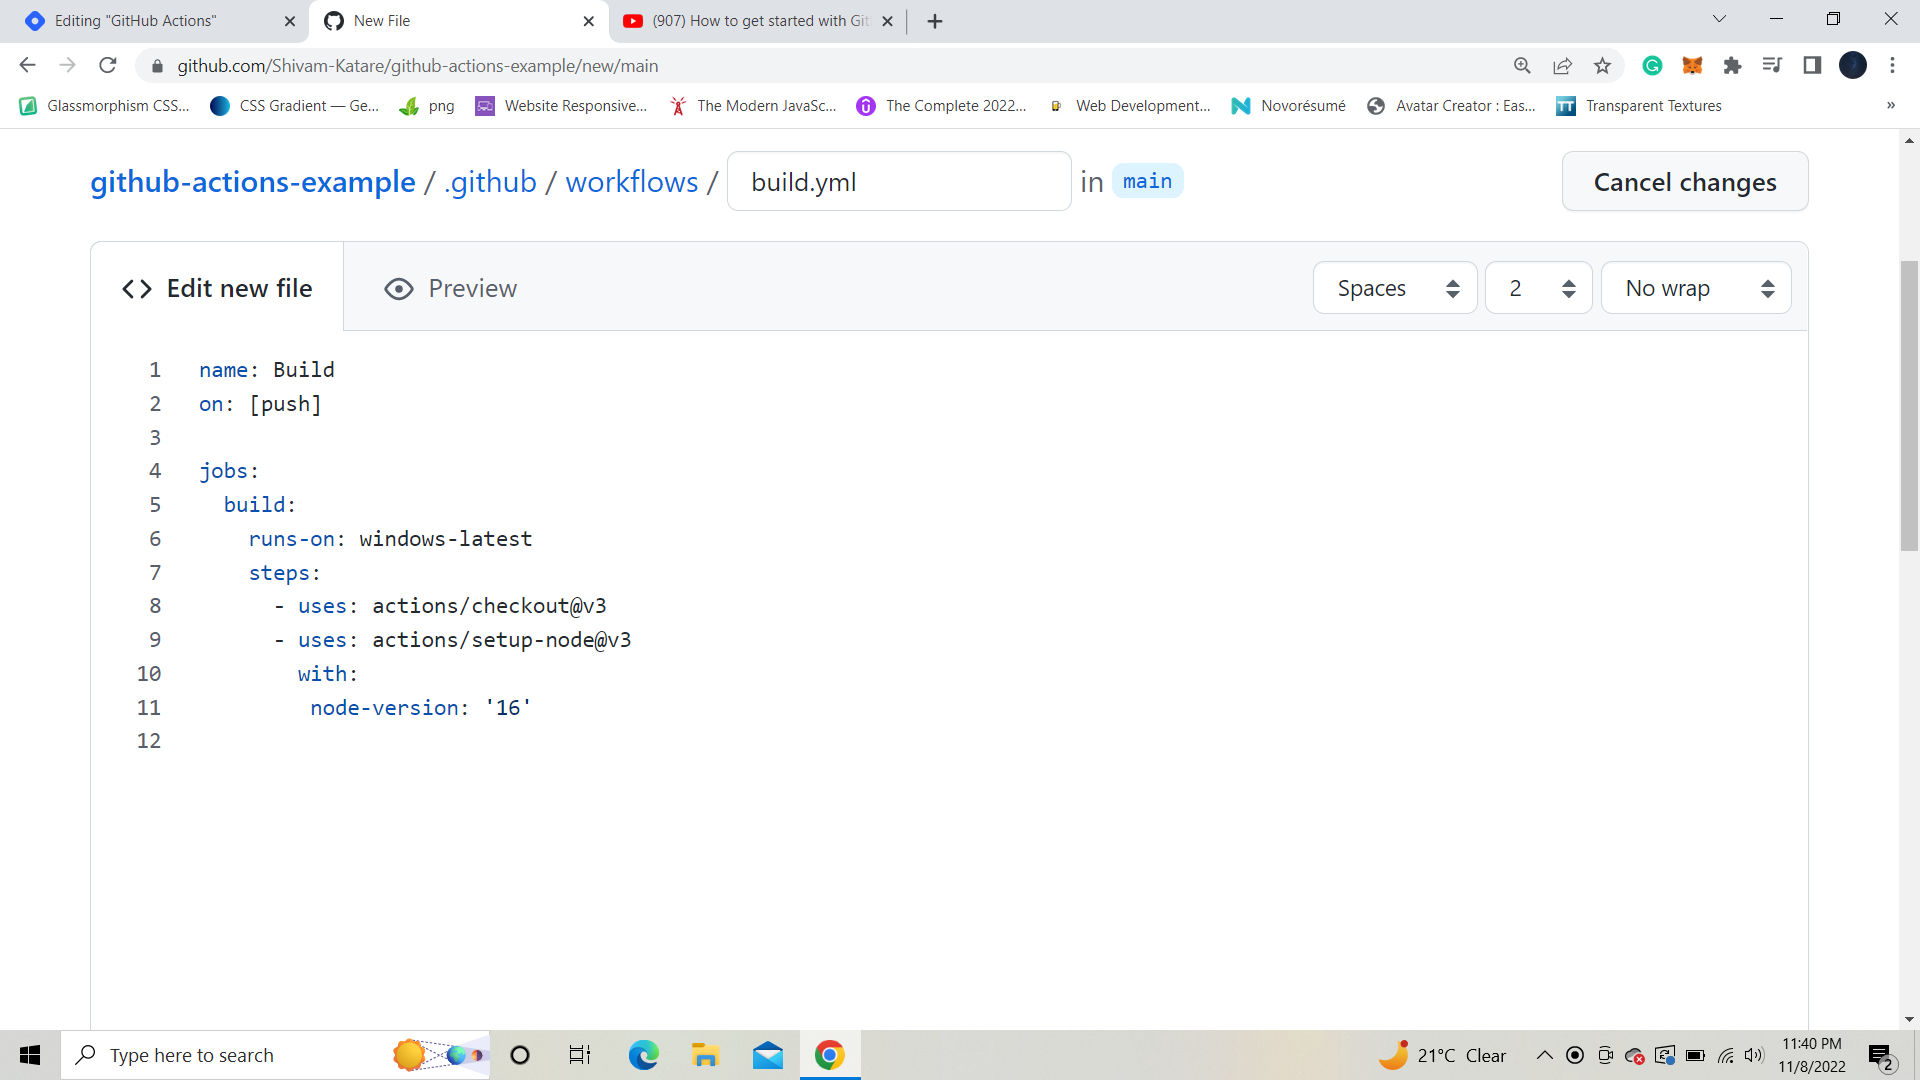
There are many versions of node, and everyone uses different versions. So, how will we specify which node version will correct for this repo? So, for this, we can use Variables inside steps.
To use variables, you can write like this 👇
...

steps:
      - uses: actions/checkout@v3
      - uses: actions/setup-node@v3
        with:
         node-version: '16'
Here 👆 you can see that I used node version: 16. It means that whenever someone pushes a code to this repo, it should contain a node with version 16. If the code does not include version 16, The run fails, or if it is, the job succeeds.
You can choose any version 16, 15, 14, etc.
Your code should now look like this.👇
The next step is to execute the command to execute the code in our index.js file. The run command can be an npm ci or npm install step, but in this case, we'll use 'node' to call our 'index.js' file.
The next step is to execute the command that will execute our code. 👇
...

steps:
      - uses: actions/checkout@v3
      - uses: actions/setup-node@v3
        with:
         node-version: '16'
      - run: node index.js
Here 👆 you can see that I use the run then, with the help of the node command, I'll call our index.js file.
Now our whole code will look like this. 👇

And that's it. You can see that you may repeat the processes within the job or have another job. So, once this job is complete, run the following one.
- For now, we will commit this file. You can enter your commit message and click on the commit button.👇
After you've committed your file, go to the 'code' tab and look for the orange circle . It means your github actions are working. 👇
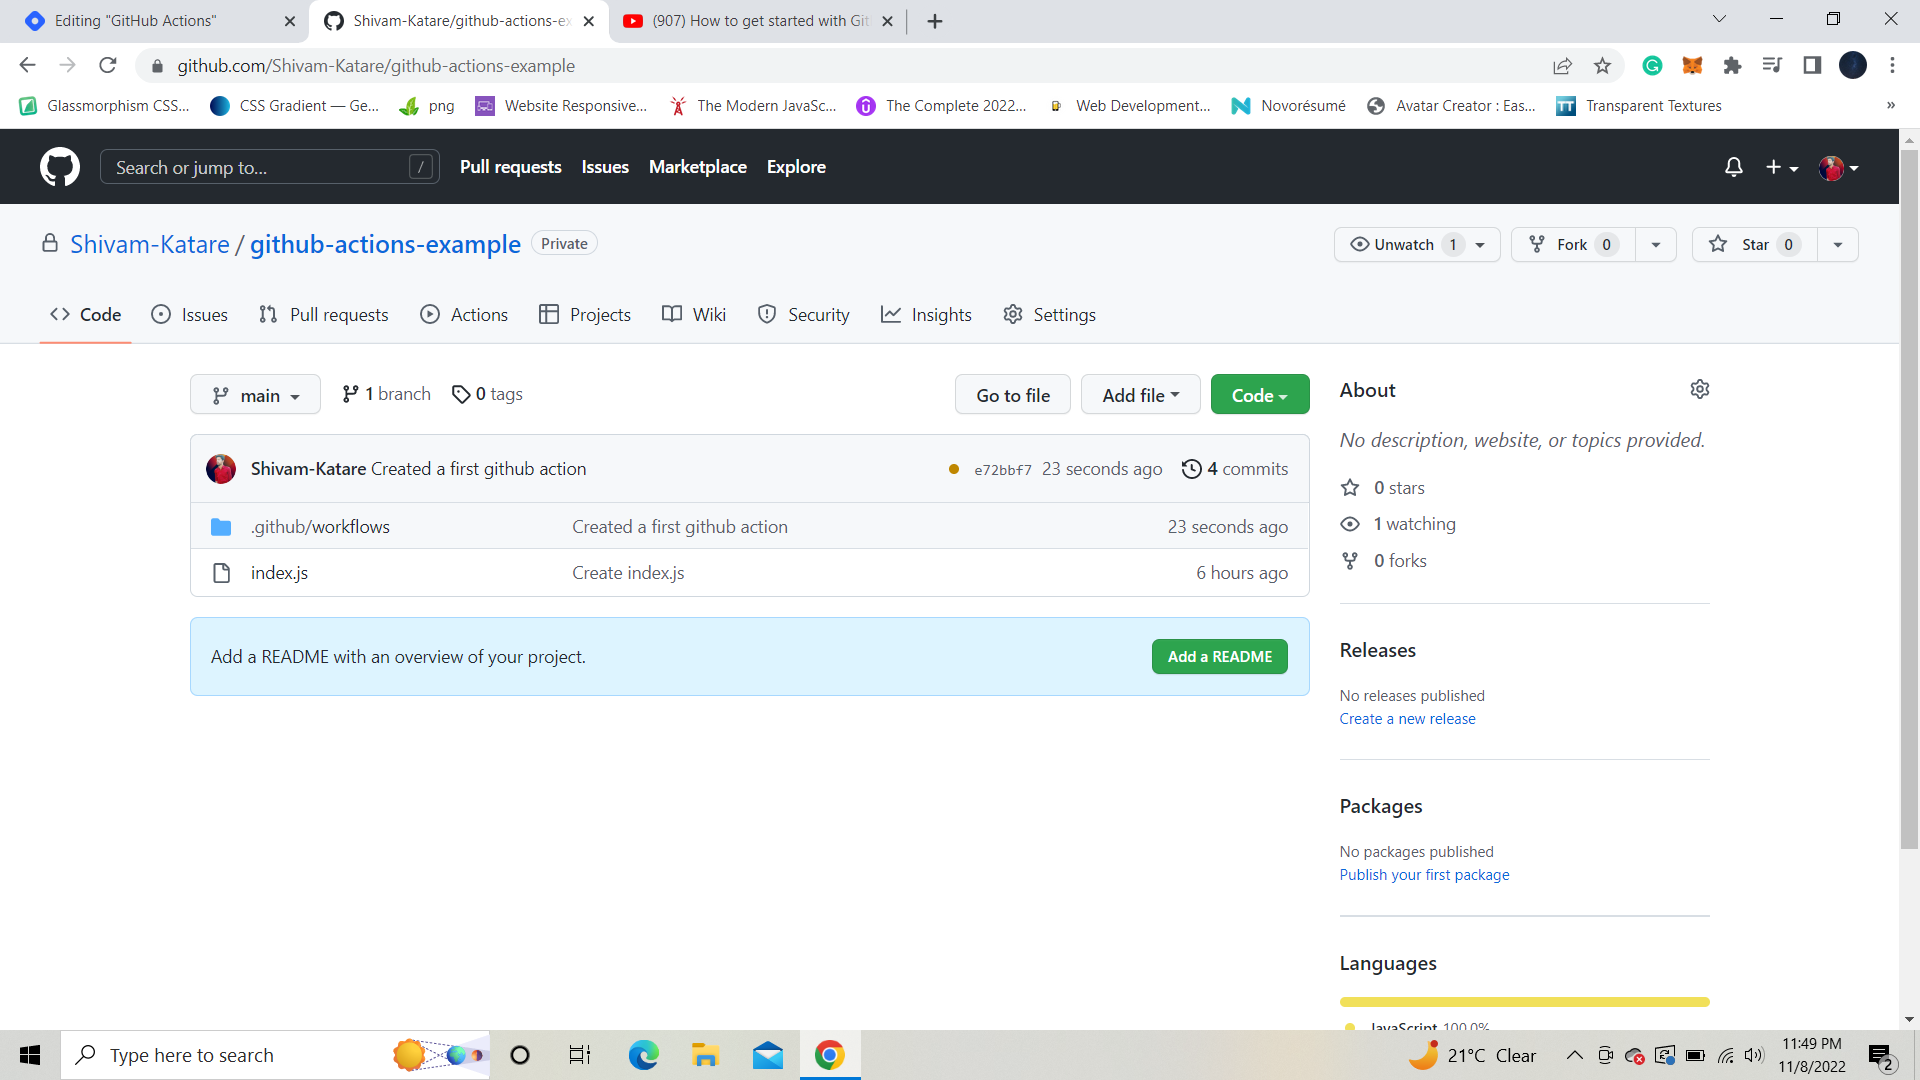
Whenever you or someone pushes any code, the github action will run.
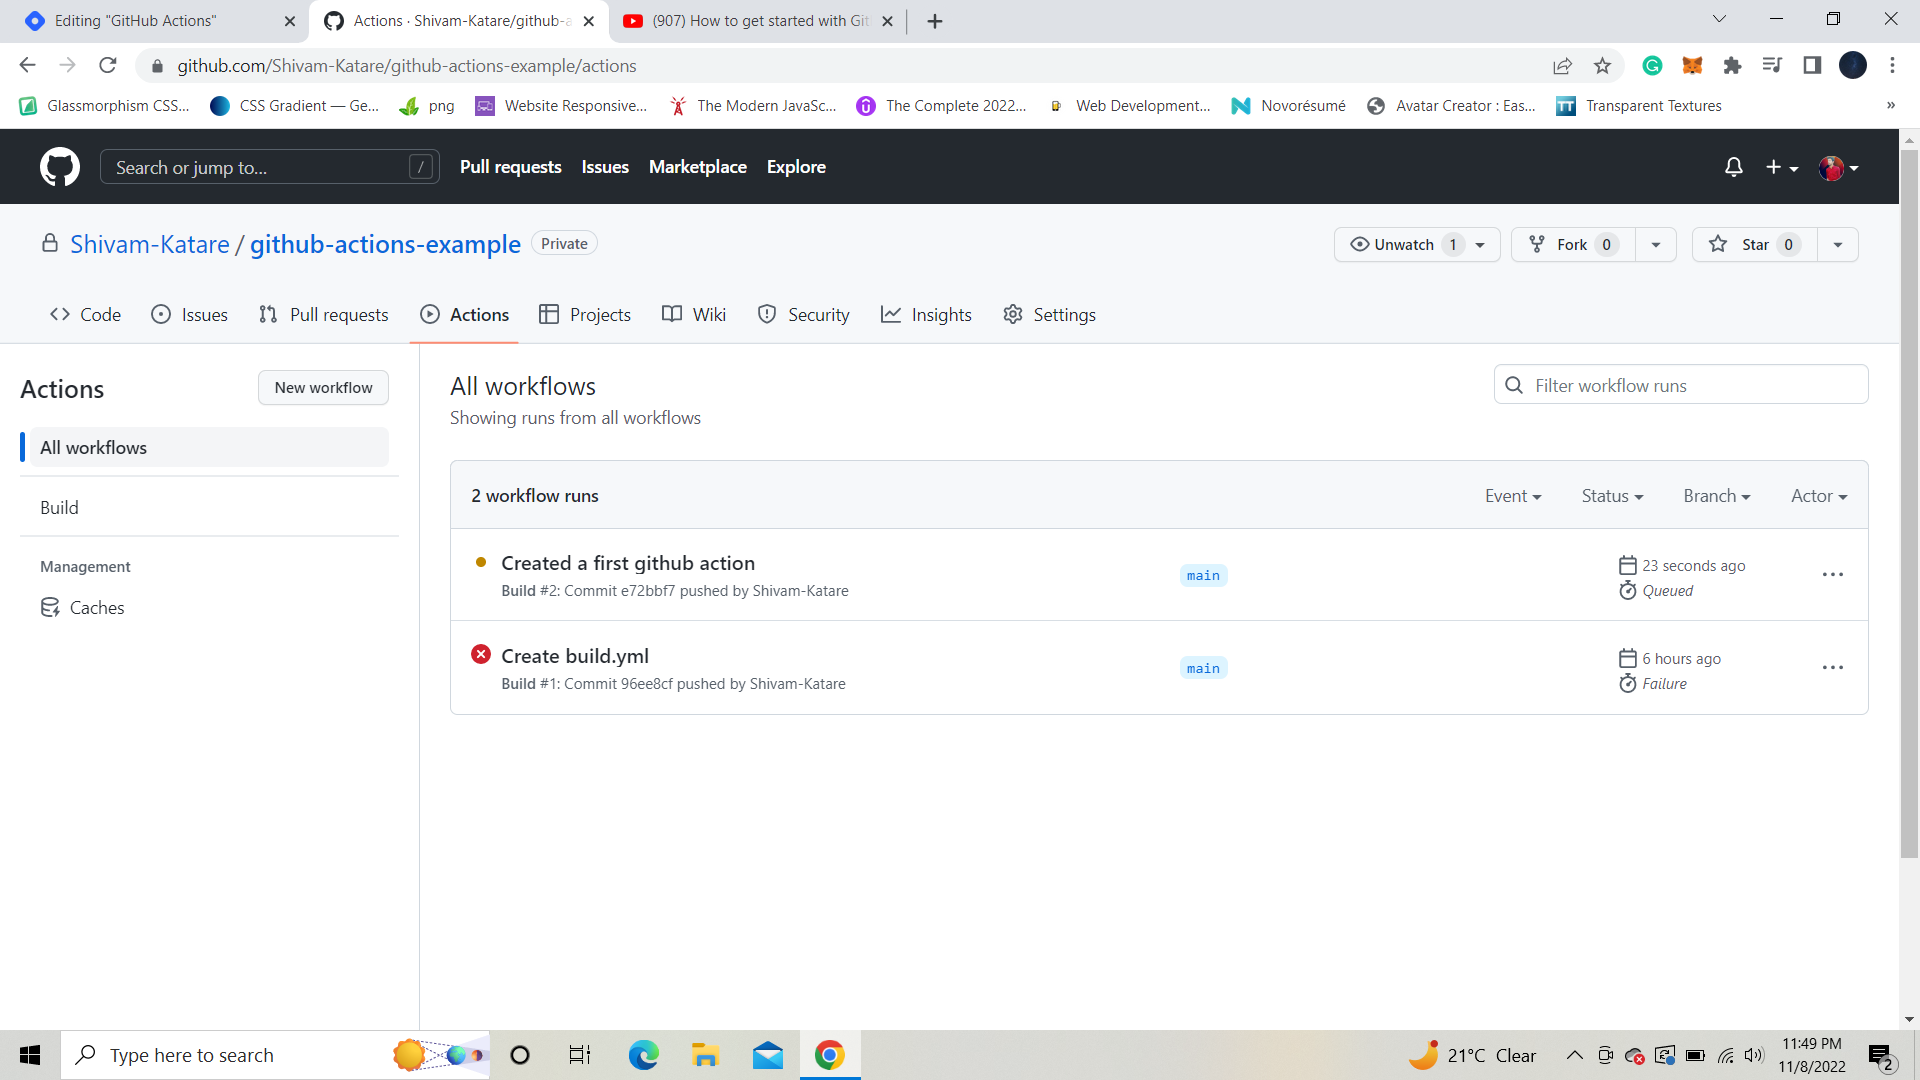
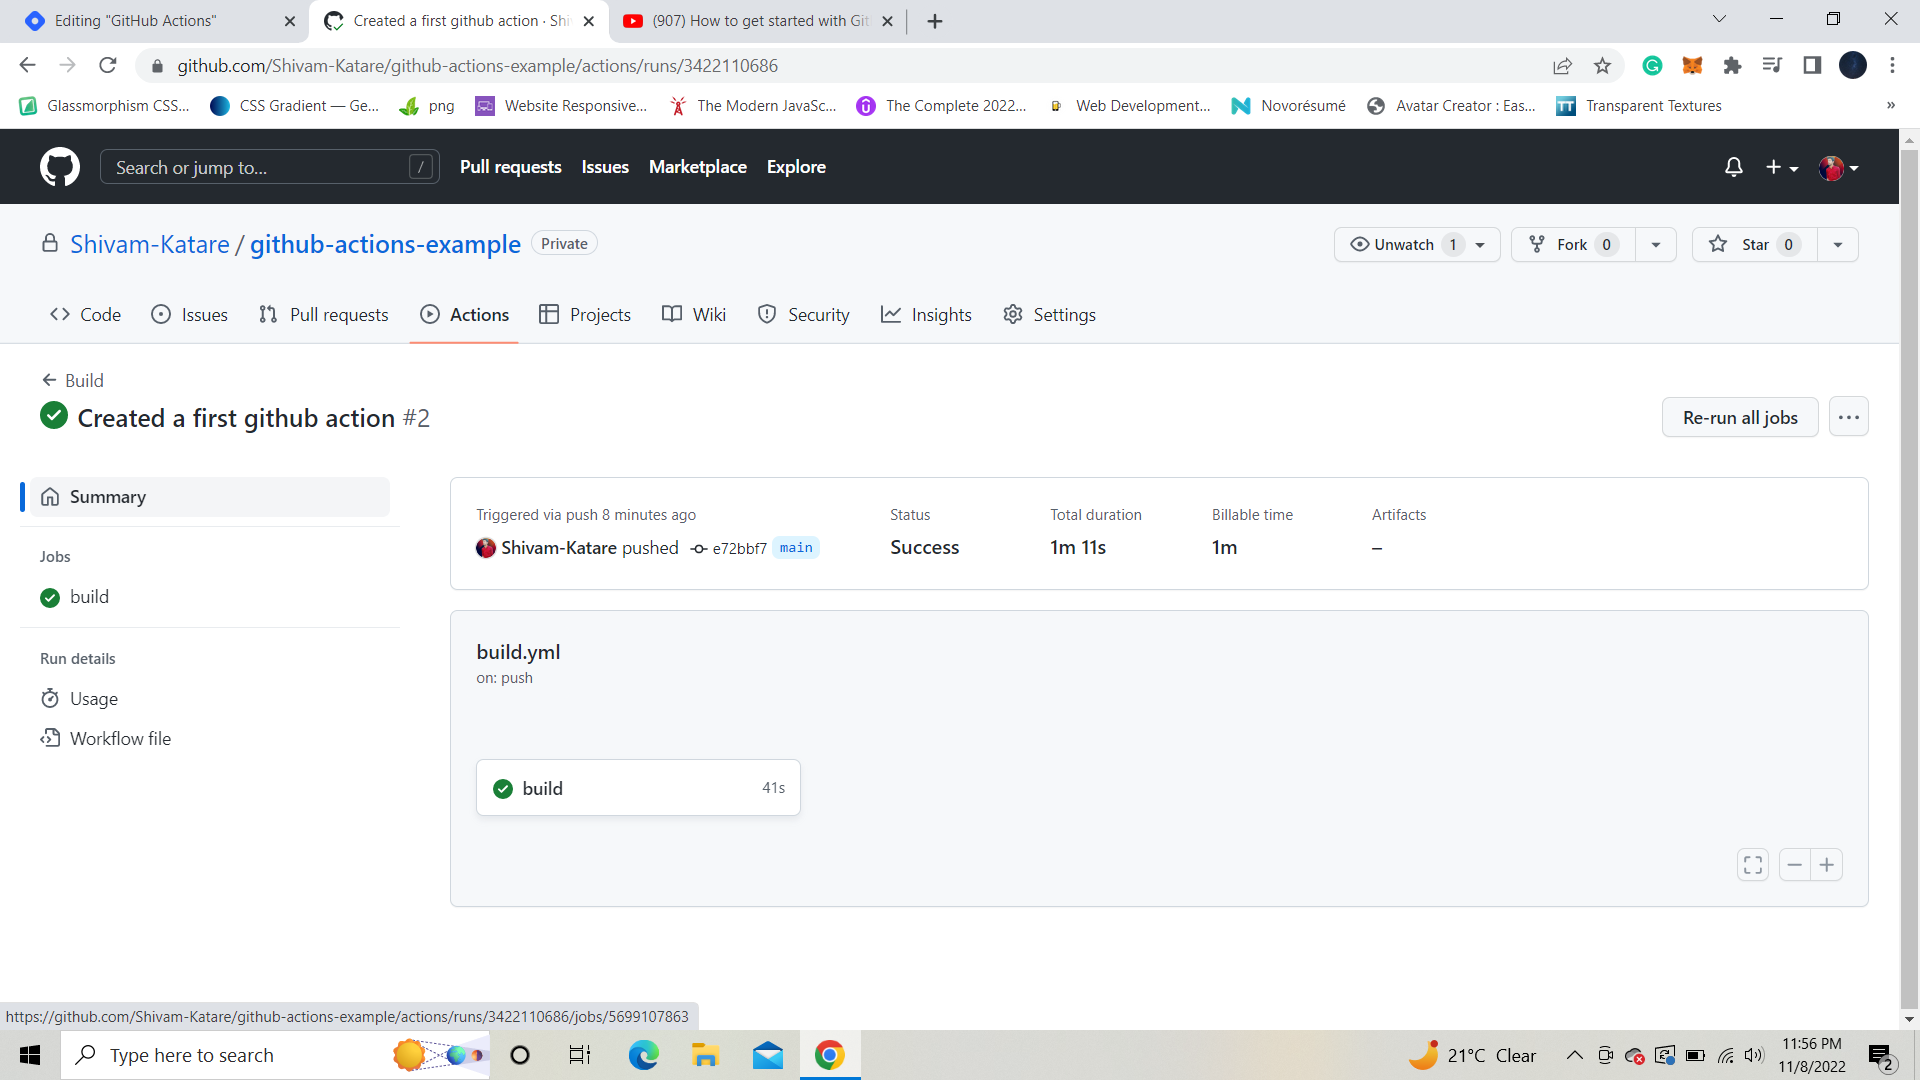
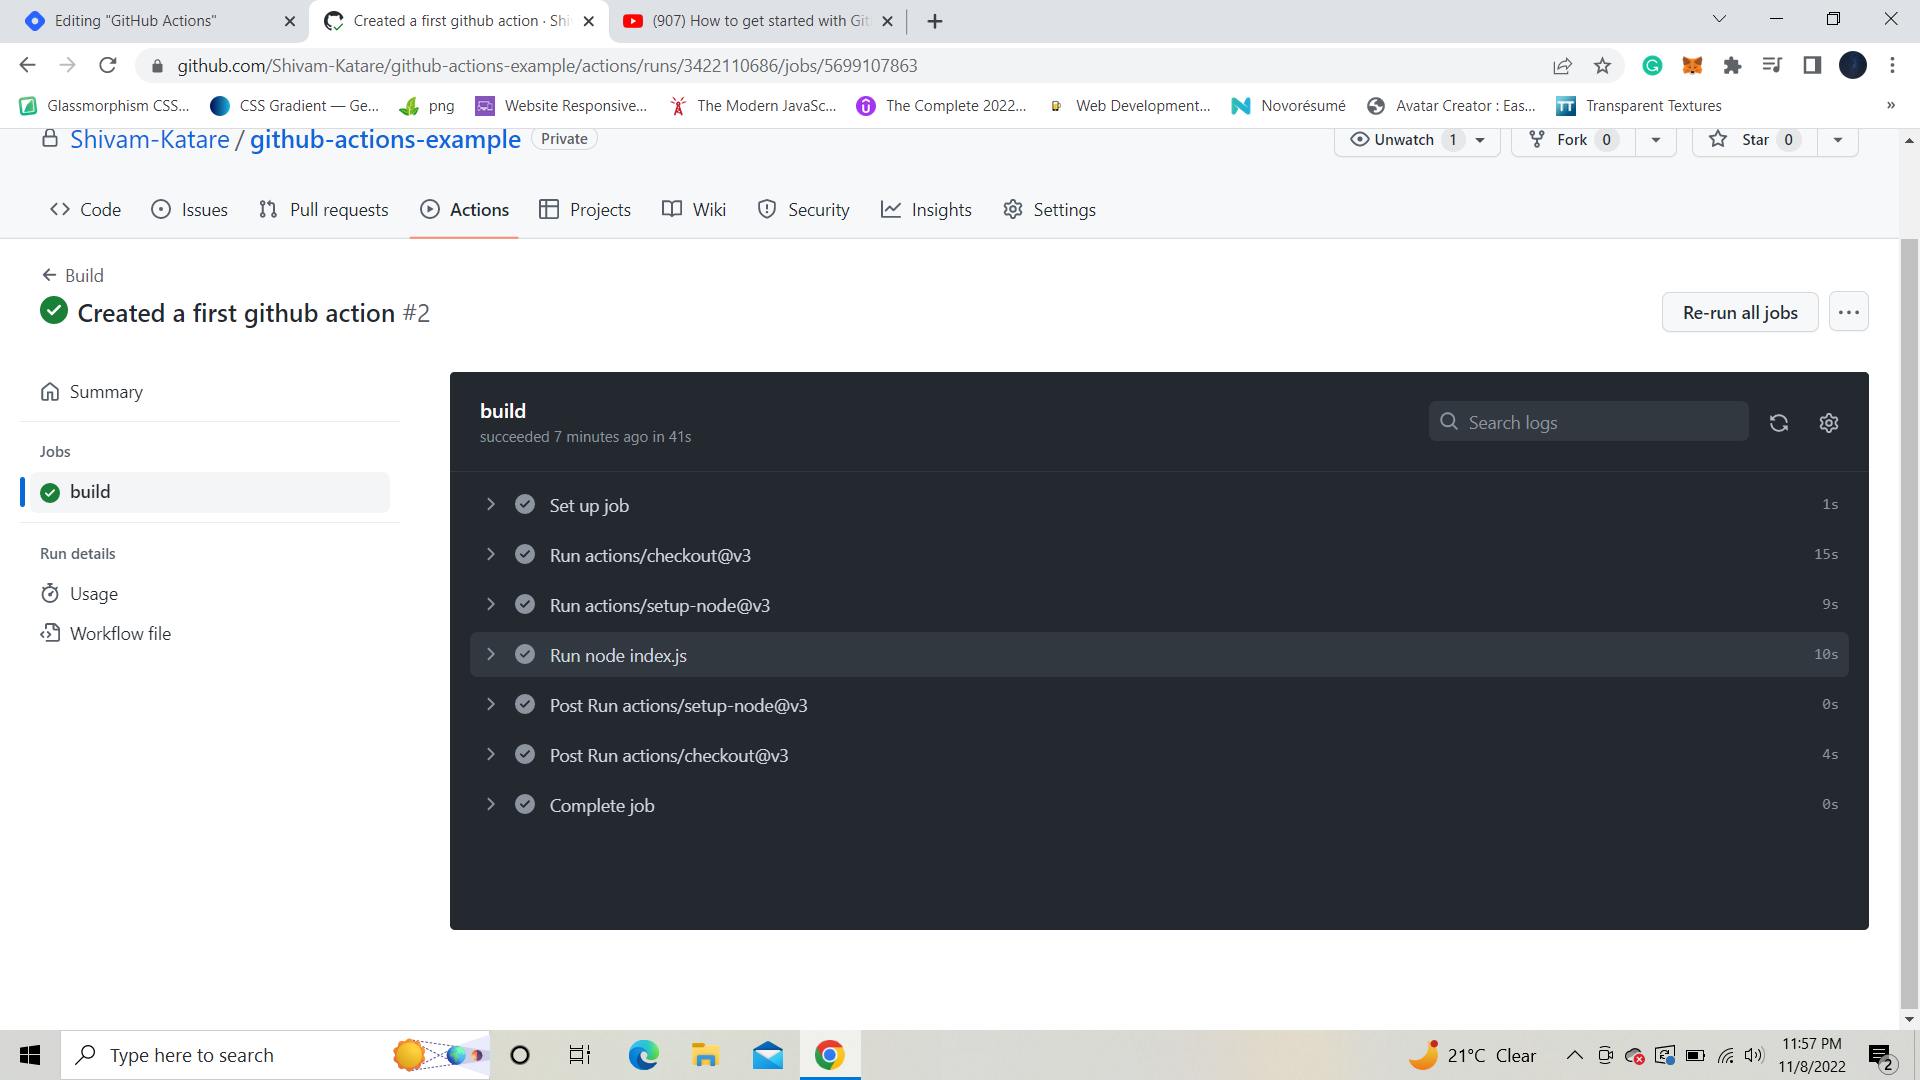
You can also check this by clicking on this Action tab. Here you can see your success and failure runs of actions. By clicking on this successful one,👇
and then, this 👇 build file,
You can see all your different steps.👇
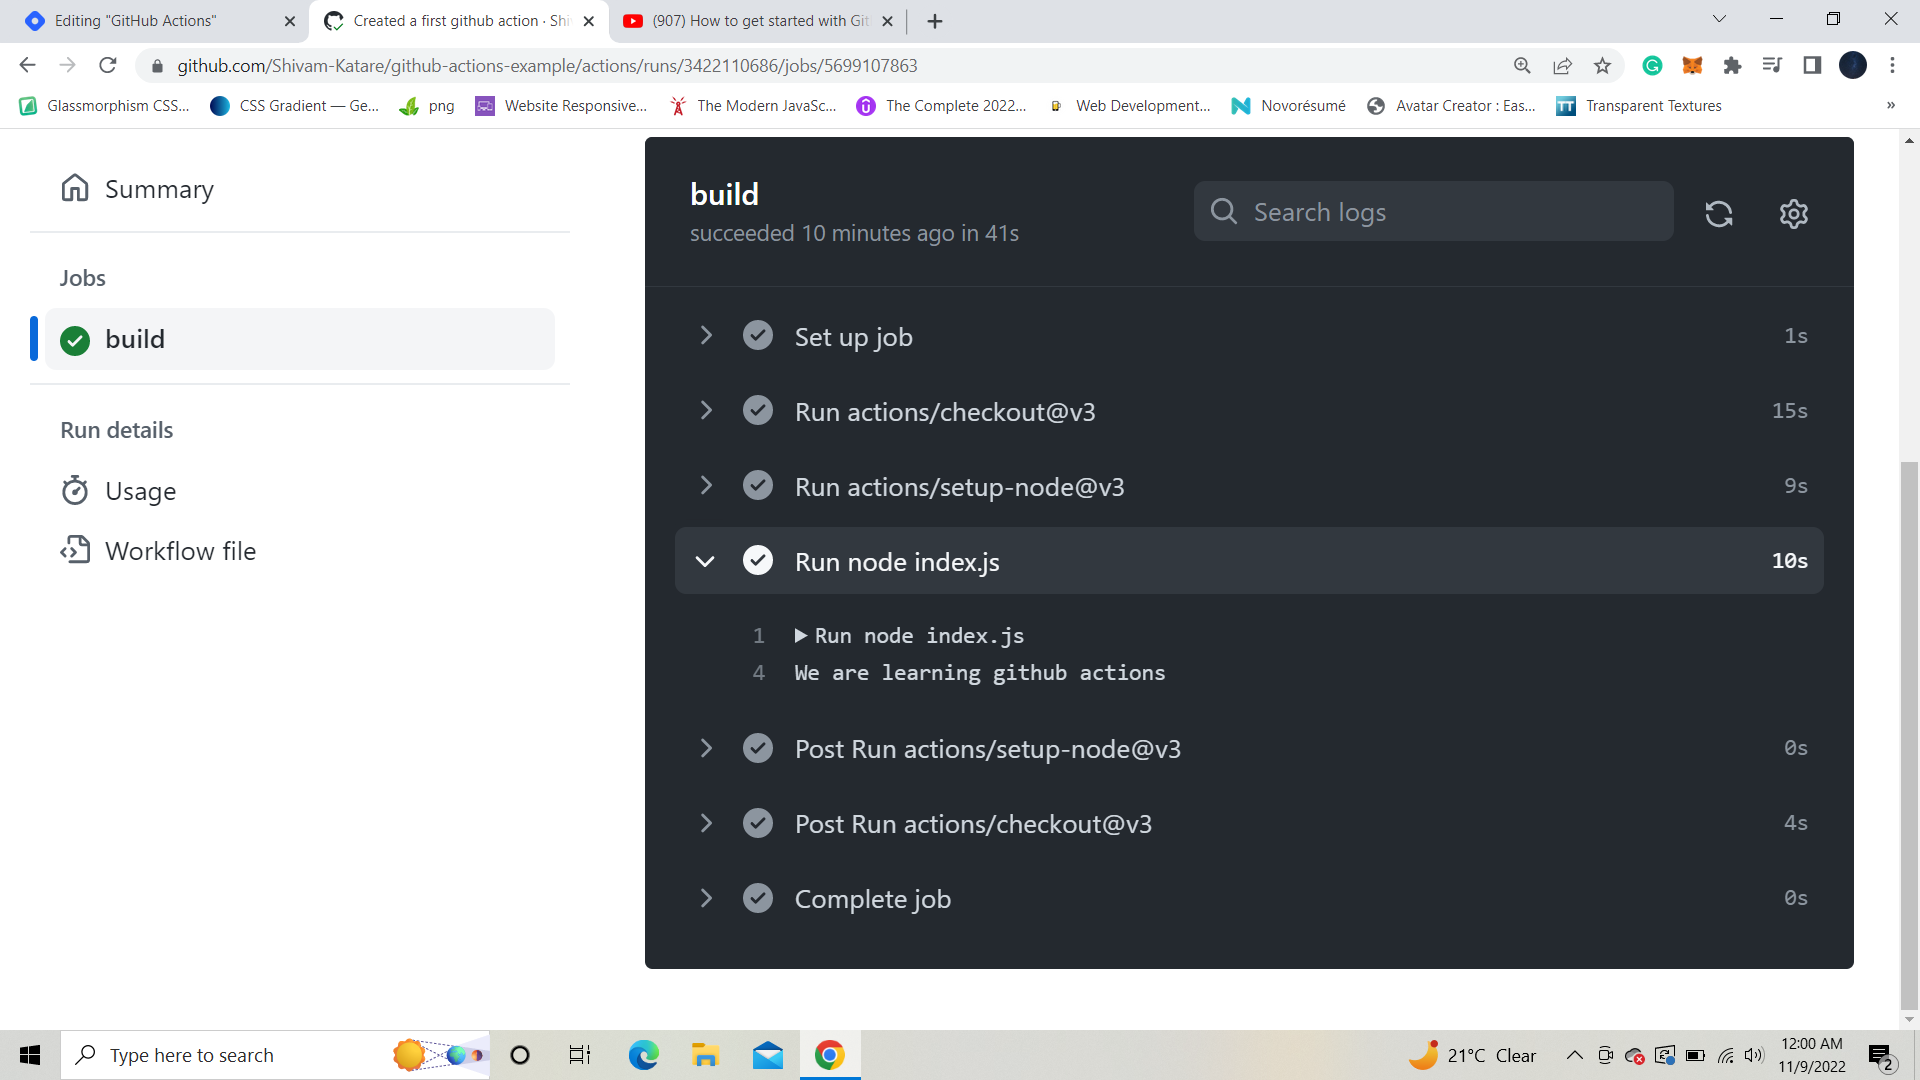
You can also explore them by clicking on each stage. If you click on this 'run node,' you can view the contents of our 'index.js' file.👇
Wrapping Up
That's all for now; hopefully, you now understand the fundamentals of Github Actions. I hope this article clarifies things.
If you learn something from it, share it with your friends and like this blog.