Persistent Log in using Cookies in React

Hello, I am Abhishek Holani. I am a Computer Engineer graduate currently working as a Java Spring Backend developer at TCS. Out of interest, I am a self-learning MERN stack as well. Currently developing my own personal projects as well as contributing to open source to better understand React.
Introduction
It's a hassle to login into applications such as social media, youtube, and GitHub which are visited by users regularly, mostly multiple times in a single day. No one wants to keep entering the same credentials every time they wish to use an application.
Persistent login takes care of this hassle as it stores these credentials in a secure form in the user's device only(in browsers in the case of web apps) and uses them to substitute entering the credentials to log in and use the application.
These secured credentials can be stored in the user's device in Local Storage and as Cookies.
Note: Session Storage is not recommended to store these credentials as the storage clears itself as soon as the session ends.
Here, we will be using cookies to store the credentials and implement our persistent login feature inside our React Application. We will be using React for Frontend and NodeJS(Express framework) for the back end.
Before we jump into creating our persistent login feature, if you are not familiar with cookies, you can read about cookies here.
Implementation
Now let us begin with the implementation. For the demo purpose, we will create a small application without databases. The idea is simple. The user will add the credentials and these credentials will be sent to the server from where we will receive our cookie. There is no sign-up required. As long as the cookie is valid/present, the user won't have to log in again.
Backend Implementation
First, let us begin with creating our server.
Create a folder named Persistent-Login. In this folder, you will have your separate backend and frontend folders. Create a folder inside Persistent-login named Backend. Now open this Backend folder in your favorite editor(I will use VSCode). Open a terminal inside VSCode and follow the below steps.
Installing packages Execute the following commands in the terminal:
npm init -y

npm i nodemon express jsonwebtoken cors

npm i
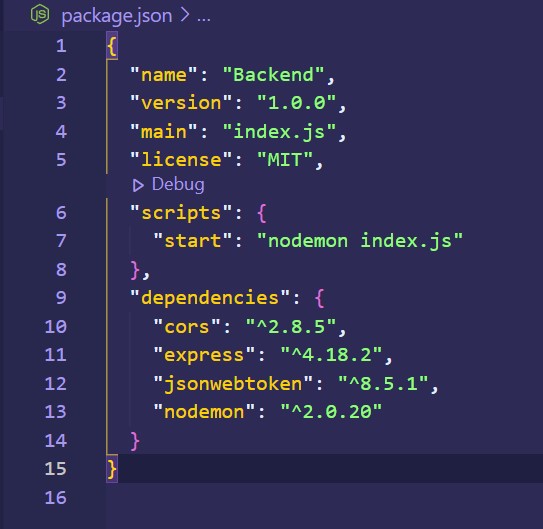
Add the below lines of code to your package.json
"scripts": {
    "start": "nodemon index.js"
 },
After this, your package.json should look like the below image:
Now create a file name index.js in the root of your backend and add the below lines of code inside it.
// index.js
const express = require("express");
const jsonwebtoken = require("jsonwebtoken");
const cors = require("cors");
const app = express();

app.use(express.json()); //allowing json data to be received from client

// here we are setting up cors so that we can make requests from cross-origin resources
app.use(
  cors({
    origin: "http://localhost:3000",
    credentials: true,
    allowedHeaders: [
      "set-cookie",
      "Content-Type",
      "Access-Control-Allow-Origin",
      "Access-Control-Allow-Credentials",
    ],
  })
);

// this is the default path. Go to `localhost:5000` on your browser to check if your server is running
app.get("/", (req, res) => {
  res.json({ Message: "Server is up and running" });
});

// this is the login path
app.post("/login", (req, res) => {
  const id = req.body?.id;
  const password = req.body?.password;
  const authToken = jsonwebtoken.sign({ id, password }, "DUMMYKEY");

  // now we will be setting cookies from server side only.
  // below cookie is httpOnly, its maxAge is 1 day
  // This cookie is valid to all the path in the domain
  res.cookie("authToken", authToken, {
    path: "/",
    maxAge: 24 * 60 * 60 * 1000,
    httpOnly: true,
  });

  res.sendStatus(200);
});

// this path will be used to check if the cookie is valid to auto login inside the application;
app.get("/autoLogin", (req, res) => {
  const cookie = req.headers.cookie;

  // if we received no cookies then user needs to login.
  if (!cookie || cookie === null) {
    return res.sendStatus(401);
  }

  return res.sendStatus(200);
});

// this path will be used to check if the cookie is valid to auto login inside the application;
app.get("/logout", (req, res) => {
  res.clear("authToken");
  return res.sendStatus(200);
});

app.listen(5000, () => console.log("Backend Running on Port 5000"));
Now, open your terminal, go to your backend folder, run the following command and go to http://localhost:5000
npm run start
Note: In the above code for the
/AutoLoginpath, I have not implemented any authentication checks for the validity of the authToken and the internal details of the decrypted token. When you implement Auto Login in your application, please add the necessary checks as per your requirements.
Frontend Implementation
Now, let us begin with frontend implementation.
In your Persistent-Login folder, run the following command, and open frontend folder in your editor:
npx create-react-app frontend
Inside /src folder of the root frontend folder, clear the file index.css & inside App.js, clear the code inside div with class App.
In this project, we will add only 2 basic components, one will be used to enter user credentials to login and receive cookies and the second will show that the user is logged in and can logout to delete the cookie.
Inside /src folder, create a folder components, and inside components, create folders Login and Homepage. Inside /Login folder, create Login.js. Inside /Homepage folder, create Homepage.js.
Login.js
Open Login.js and add the below code inside it. Here we have a basic layout consisting of 2 input fields for email id and password, and one submit button. Once you login with credentials, you are redirected to homepage. We have used an useEffect hook below to implemented auto-login i.e. persistent login. When the Login page is loaded, the useEffect hook makes call to autoLogin endpoint on backend. In this request the cookie is also transfered and if server returns a proper response, the user is directly redirected to homepage without adding credentials.
// Login.js

import React, { useEffect, useState } from "react";
import { useNavigate } from "react-router-dom";

function Login() {
  const [userInfo, setuserInfo] = useState({ id: "", password: "" });
  const handleOnChange = (e) => {
    setuserInfo({ ...userInfo, [e.target.name]: e.target.value });
  };
  const navigate = useNavigate();

  useEffect(() => {
    async function autoLogin() {
      const response = await fetch("http://localhost:5000/autoLogin", {
        method: "GET",
        credentials: "include",
      });
      if (response.status === 200) {
        navigate("/homepage");
      } else {
        navigate("/");
      }
    }
    autoLogin();
  }, []);

  const submit = async (e) => {
    e.preventDefault();

    if (userInfo.id.trim().length > 0 && userInfo.password.trim().length > 0) {
      const response = await fetch("http://localhost:5000/login", {
        method: "POST",
        credentials: "include",
        headers: {
          "Content-type": "application/json",
        },
        body: JSON.stringify({
          id: userInfo.id,
          passsord: userInfo.password,
        }),
      });
      if (response.status === 200) {
        navigate("/homepage");
      }
    }
  };

  return (
    <div className="container">
      <input
        className="input"
        name="id"
        type="text"
        placeholder="Enter ID"
        onChange={(e) => handleOnChange(e)}
      />
      <input
        className="input"
        name="password"
        type="password"
        placeholder="Enter password"
        onChange={(e) => handleOnChange(e)}
      />
      <button className="btn" type="button" onClick={(e) => submit(e)}>
        Login
      </button>
    </div>
  );
}

export default Login;
Homepage.js
Now, open Homepage.js file and add the below code. Here we have a logout button, once we click it, we are redirected to Login page and the cookie is also destroyed from the browser. Now if user goes to Login page, they need to login again, to go Homepage.
import React from "react";
import { useNavigate } from "react-router-dom";

function Homepage() {
  const navigate = useNavigate();
  async function logout() {
    const response = await fetch("http://localhost:5000/logout", {
      method: "GET",
      credentials: "include",
    });

    if (response.status === 200) {
      navigate("/");
    }
  }

  return (
    <div className="container">
      <p>This is Homepage, Welcome!</p>
      <button className="btn" onClick={logout}>
        Logout
      </button>
    </div>
  );
}

export default Homepage;
If you want to check your cookies, you can open your Developers tools and go to Application Tab -> Cookies. You can find your cookie inside http://localhost:3000 domain.
Wrapping Up
This above implementation is just a dummy demo. There are still many things you should implement to use this Persistent login feature in your applications.
Implement a cookie parser to work with multiple cookies.
Once you get authtoken, you can decrypt it and check your database for user credentials.
... so on
You can also find the entire code base on these given repositories, Frontend && Backend
The frontend repository also contains some CSS code like Login.styled.css and Homepage.styled.css. However, these files are optional in this implementation as the main motive here is to understand persistent login using cookies.
Thank you!